Search this blog

Showing posts with label pasta. Show all posts

Tuesday, September 4, 2012

A Laborless Labor Day!

There are many reasons to love Labor Day, the main one being that there is no work!  But, there is also barbequing and celebrating outside with friends and family.  I love barbeque food, but this time I decided to do something different (especially since I don't have a grill!)  This dinner would be perfect to bring to a picnic and celebrate the end of summer.  Plus it's all really easy - there's no laboring away in the kitchen on Labor Day!
Drink...
Pineapple Upside Down Cake Cocktail
*recipe from Pinnacle Vodka
I'm not gonna lie...I mainly chose this drink because I had all the ingredients in my apartment.  However, I will say that pineapple juice does remind me of summer and it was an easy, delicious drink that would be perfect for a labor day party!
Ingredients:
  • 2 oz Cake Vodka
  • 4 oz club soda
  • splash of pineapple juice
  • Maraschino cherry
Directions:
  1. Mix the first three ingredients in a glass full of ice.
  2. Garnish with a cherry.
Dinner...
BLT Pasta Salad and Fried Pickles
What's better than a pasta salad and some fried food for a Labor Day party? Maybe a hamburger would be better (if you know me, you know I am obsessed with hamburgers), but I can't always make a burger, so this is a great second best :) Plus, Doug was out of town this weekend, so I was trying to take advantage of that and make things that I know he doesn't like and wouldn't eat if he were there.
BLT Pasta Salad
*recipe from: A Bird and a Bean
Pasta salad is a classic side dish for any picnic or barbeque.  This time, the pasta salad can be the main dish.  If you like a BLT, you will like this pasta.  I would add a little more bacon, because more bacon is always a good thing!
Ingredients:
  • 12 ounce corkscrew shaped pasta
  • 1/2 cup milk
  • 12 ounces lean bacon
  • 3 medium ripe tomatoes, cut into chunks
  • 1 tablespoon chopped fresh thyme
  • 1 clove garlic, minced
  • Kosher salt and freshly ground pepper
  • 1/2 cup mayo (you could use 1/4 cup mayo and 1/4 cup greek yogurt)
  • 1/4 cup sour cream
  • 4 tablespoons chopped chives
  • 5 heads Bibb lettuce, quartered, or 5 cups chopped romaine hearts
Directions:
  1. Cook the pasta in a large pot of salted boiling water as the label directs. Drain and toss with the milk in a large bowl; set aside. 
  2. Meanwhile, cook the bacon in a large skillet over medium-high heat until crisp. Drain on paper towels. Discard all but 3 tablespoons drippings from the pan. 
  3. Add the tomatoes, thyme and garlic to the pan and toss until warmed through; season with salt and pepper.  
  4. Crumble the bacon into bite-size pieces; set aside 1/4 cup for garnish. Toss the remaining bacon and the tomato mixture with the pasta. 
  5. Mix the mayonnaise, sour cream and 3 tablespoons chives with the pasta until evenly combined. Season with salt and pepper. 
  6. Add the lettuce; toss again to coat. 
  7. Garnish with the reserved bacon and the remaining 1 tablespoon chives. Serve at room temperature.  
Fried Pickles with Chipotle Mayo Dip
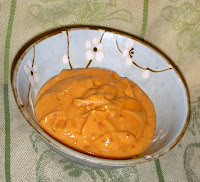
I am somewhat new to fried pickles since I have only had them a few times.  But, the times I have had them, I LOVED them!  These pickles were good, but I think I'll stick to getting them at restaurants rather than making them at home.  If you do make them (and don't get me wrong - they were good, I ate all of them!), I might leave out the cornmeal and I would definitely make the chipotle mayo again.  But watch out, because the chipotles can be really spicy!
Ingredients: 
for the pickles:
  • 1 24-ounce Jar Kosher dill pickle spears or slices
  • 1 tsp garlic powder
  • 1/2 cup Louisiana hot sauce (I like Texas Pete)
  • 1/2 cup buttermilk
  • 1 gal peanut oil
  • Uncle Bubba's Fry Mix
    • 6 cups self-rising flour (If you can’t find self-rising flour, use 6 cups all-purpose flour plus 3 tablespoons baking powder and 1 1/2 teaspoons salt)
    • 1 cup self-rising white cornmeal (If you can’t find self-rising cornmeal, use 3/4 cup plus 3 tablespoons white cornmeal, 1 tablespoon baking powder, and 1/2 teaspoon salt)
    • 1 teaspoon salt
    • 1 teaspoon pepper 
 for the dip: 
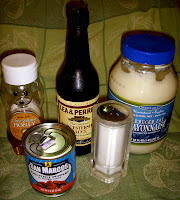
  • 1 cup mayonnaise
  • 1 chipotle pepper (from the can with adobo) 
  • adobo sauce (from the can of peppers) 
  • 1 teaspoon salt 
  • 1/3 cup honey
  • 5 drops Worcestershire sauce
Directions: 
for the dip:
  1. Combine all the dip ingredients in a food processor or blender. For the adobo sauce, I used all the sauce in the can, but maybe start with a little and work your way up. Blend it all together until it’s thoroughly combined, then place in a bowl and chill until serving.
for the pickles: 
mmm...fried food
  1. Make the fry mix by combining all the ingredients in a large bowl.
  2. Drain the juice from the pickle jar and refill the jar with the garlic powder, hot sauce, and buttermilk. Marinate the pickles for at least 30 minutes. 
  3. In a Dutch oven over medium-high heat, heat the oil to 350 degrees F. Drain the pickles. 
  4. Put the fry mix in a large mixing bowl, and toss the pickles to coat thoroughly. Shake off the excess mix by tossing lightly in a strainer and deep fry the pickles in batches for 3 to 5 minutes, depending on the size of the spears.
  5. When golden brown, remove the pickles from the oil with a clean strainer or slotted metal spoon and place on paper towels to drain off any excess oil. Serve immediately. 
Dessert... 
 
Lemon Brownies
*recipe from: Rita's Recipes
These are soooooo good.  I almost ate the whole pan at once.  Mine turned out really thin, so they were more like soft lemon cookies.  But still, soooo good.  And, if you want them thicker and more like a brownie, just use a smaller pan the correct size pan (oops - see my note below).  They are also really refreshing which is perfect for a hot Labor Day party.  Mmmm....if you like lemon, make these - you will be so happy!  I think I'm going to go eat one right now :)
Ingredients:
for the brownies:
  • 3/4 C flour
  • 3/4 C sugar
  • 1/4 t salt
  • 1 stick butter, soft
  • 2 eggs
  • juice from 1/2 lemon (about 1T) *I added WAY more because I like it very lemony.  Taste the batter and add more lemon to taste*
  • zest from 1/2 lemon (about 1t)*I added more of this too - zest of 1 whole lemon*
for the glaze:
  • 1/2C powdered sugar
  • 1 T lemon juice *I used way more!*
  • additional lemon zest
Directions:
for the brownies:
  1. Combine the flour, sugar and salt in a large bowl.
  2.  Mix in the softened butter.
  3. In another bowl whisk the eggs with the lemon juice and zest.  Add to the larger bowl and mix well.
  4.  Pour into prepared 8X8 brownie pan. (ohhh...whoops - I used the 9x13 pan which I now see is for the doubled recipe)
  5.  Bake at 350 for 25 minutes.
  6. You can double the recipe and bake in a 9X13 pan for 30 minutes.
  7. Remove and let cool, then glaze.
for the glaze:
  1. Stir all ingredients together. 

Monday, June 18, 2012

A Delicious Dinner for Doug

I told you all that June was a big birthday month for me.  My last post was for my sister's birthday and this one is for my fiance, Doug's birthday!  I wanted to make him a dinner of all his favorite things.  Well, his favorite thing I can make is actually chicken piccata, and I already made that for my blog.  So...I made his second favorite dinner :)
Drink...
Bière de Belœil
I always feel like I am kind of cheating when I just put a beer or wine on here instead of making a cocktail.  However, I can truly say that beer is Doug's favorite drink.  I let him pick this one out.  This beer is brewed by one of Doug's favorite breweries; Brasserie DuPont.  He decided to try it because of that brewery being one his favorites.  However, he said it was good, not outstanding.  If you want to try a real stand-out beer from Brasserie DuPont, than try one of their Saison beers.
Ingredients:
  • A slightly chilled bottle of Bière de Belœil (we keep ours in our wine fridge at 50 degrees Fahrenheit)
Directions:
  1. Pour and enjoy :)
Dinner...
Chicken and Asparagus Pasta 
*recipe from Maureen K.
This is one of Doug's (and my) favorite pasta dishes of all time!  It is soooo good and soooo easy to make!  It was invented by my mom (I know...she is such a great cook).  Please, make it....I guarantee you will like it!  Just an FYI - I always add WAAAY more red pepper flakes than the recipe calls for, and quite a few more splashes of wine and lemon juice than it calls for just to make it extra flavorful.
Ingredients:
  • 1 lb asparagus, cut into 1-2 inch long pieces
  • 3/4 cup olive oil
  • 4 to 6 cloves of garlic (I use 6)
  • 1/2 tsp red pepper flakes (I use A LOT more - probably about 1 1/2 - 2 tbs!  It really is not spicy, just adds more flavor)
  • 1 whole tomato, chopped or grape tomatoes, sliced (I usually don't add tomatoes, but it would be good in it)
  • 2 - 3 tbs lemon juice (I usually add a little bit more)
  • 1/3 cup white wine (again, I usually add a few extra splashes)
  • garlic powder
  • salt
  • pepper
  • 1 lb chicken breast, chopped into pieces
  • Parmesan cheese
Directions:
  1. Season the chicken breast pieces with salt, pepper, and garlic powder.  Cook in olive oil until almost done.  Remove from pan.
  2. Cook linguine according to the package directions.
  3. Cook asparagus in microwave until tender.
  4. Add 3/4 cup of olive oil to the pan the chicken was cooked in.  Cook garlic and red pepper in oil. 
  5. Add chicken, asparagus, white wine, lemon juice, and tomato.  Heat through.
  6. Toss the linguine with the Parmesan cheese.
Dessert...
Liege Style Waffle with Speculoos Spread
There is a food truck here in NYC called Waffles and Dinges.  I first tried their waffles last fall and immediately told Doug he had to try them.  Since then, we are both officially addicted!  They have many different kinds of waffles there, but the only one we have had is the "Throwdown Waffle".  It's named that because the owner of the truck was on the TV show Throwdown with Bobby Flay and won.  It is one of their Liege style waffles with Speculoos Spread and whipped cream.  
Doug also has a recent addiction (I do too, but not as strong of an addiction) to Speculoos Spread.  It is a delicious Belgian gingerbread cookie spread (I don't really like gingerbread, but I love this stuff!).  Doug prefers the one bought from Le Pain Quotidien, which is the one we used in this recipe.  I prefer the one from Trader Joes.  They call it Cookie Butter and I think it is less gingerbready.  Plus it is cheaper and comes in a bigger jar :)  
This is a super easy recipe to make (especially since we don't have a waffle maker, so I just bought a Liege style waffle they sell in packages at convenience stores around here) and is really incredibly delicious. 
Ingredients:
  • 1 Liege style waffle
  • Speculoos Spread
  • Whipped cream
Directions:
  1. Make a waffle, or buy a pre-made one like me.  If you buy one, put it in the toaster to heat it up and toast it a bit.
  2. Spread Speculoos over the warm waffle.
  3. Top with whipped cream, and try not to eat it too fast :)

Thursday, May 3, 2012

Birthday Dinner

This is my big birthday—not only is it my 30th, but it was also my Golden Birthday!  I had a great day and to celebrate, I made myself a special birthday dinner.  Hmmm . . . I'll have to remember next year to have a guest blogger and have Doug make my birthday dinner :)
Drinks...
Birthday Drink
*recipe adapted from Sweetapolita
The original recipe was for birthday shots, but I decided that I would prefer a whole drink.  Also, I did not buy all of the ingredients, so I left a few things out.  Despite all the changes, it was still a great drink.  It kind of reminded me of a chocolate martini.  It also had quite a kick since it was made of almost all alcohol.  We even had a candle in it at one point for an extra special birthday treat!
Ingredients:
  • 3 ounces cake flavored vodka (e.g. Pinnacle or Three Olives)
  • 1 1/2 ounces whipped cream flavored vodka (e.g. Pinnacle) or chocolate liqueur (I used chocolate liqueur)
  • 1 ounce half & half
  • whipped cream (for topping)
  • sprinkles (for topping)
Directions:
  1. Pour all the ingredients in a shaker with ice.
  2. Shake, strain, pour.
  3. Sing "Happy Birthday"
  4. Enjoy!
Dinner...
Scallops with Linguine
*recipe from Maureen K.
When I was a kid, my mom always let us choose what we wanted her to make for our birthday dinners.  I had a few recipes of hers that were my favorite, but I frequently chose Shrimp and Linguine.  So, for this dinner, I thought I would make an old classic birthday dinner (that I still love).  I did change one thing . . . Doug doesn't like shrimp and I wanted us to both be able to eat it, so I made is with Bay Scallops (or Small Scallops as they call them here in NYC).  It was just as good as the old days!
Ingredients:
  • 1/2 cup margarine or butter (I went with butter . . . it is my birthday after all!)
  • 1/4 cup olive oil
  • 6 cloves of garlic (this is a lot, but I love garlic)
  • 1/2 lb – 1 lb of Bay Scallops or Shrimp
  • 1/4 cup parsley
  • 1/4 tsp dried basil
  • 1/4 tsp dried oregano
  • 1/4 tsp salt
  • dash black pepper
  • 1 lb linguine (Trader Joe's only has whole wheat spaghetti, so I used that.  But, I missed the linguine)
  • grated Parmesan cheese

Directions:

Scallops cooking in a yummy bath
  1. Melt butter in a saucepan, add oil and heat.
  2. Saute garlic and scallops/shrimp in the oil mixture over medium heat 2-3 minutes.

  3. Stir in parsley, basil, oregano, salt, and pepper.  Simmer 5-10 minutes.
  4. Cook spaghetti per package directions and drain well.
  5. In a large bowl toss linguine, sauce, and Parmesan cheese to taste. 
Dessert...
Devil's Food Cake with Chocolate Mousse Buttercream 
*recipe from Sticky, Chewy, Messy, Gooey by: Jill O'Connor
This is my new favorite cake.  I have made it a couple times before and it is always a hit!  Beware though, because it tastes good for a reason.  It is probably the worst thing for you I have ever made!  It makes a huge cake and is so good I couldn't resist.  I think I shed a tear when I ended up having to throw a lot of it away because I was just enjoying too much of it!  From now on, I am only making it for a large group so I am only able to have 1 slice!  The recipe is a little involved, but it is well worth it!
Ingredients:
For the cake-
  • 1/3 cup cocoa powder
  • 1 tsp instant espresso
  • 4 oz semisweet or bittersweet chocolate, finely chopped
  • 1 cup boiling water
  • 2 tsp vanilla extract
  • 1 cup buttermilk
  • 1/2 cup unsalted butter, at room temperature
  • 1/2 cup vegetable oil
  • 1 cup firmly packed brown sugar
  • 1 cup granulated sugar
  • 3 large eggs
  • 2 1/4 cups flour
  • 1 tsp baking soda
  • 1/2 tsp salt
  • chocolate mousse buttercream
For the chocolate mousse buttercream-
  • 6 large eggs
  • 1 1/2 cups sugar
  • 2 tbs cocoa powder
  • 1 tsp vanilla
  • pinch of salt
  • 1 1/2 lbs cold unsalted butter
  • 12 oz semisweet chocolate, melted

Directions:

For the Devil's Food Cake-
  1.  Preheat oven to 350 degrees.
  2. Spray two 9 inch pans with non-stick cooking spray.
  3. In a large bowl, combine the cocoa powder, espresso powder, and chocolate.  Pour in the boiling water and stir until the chocolate is melted and the mixture is smooth.  Stir in the vanilla.  Let the mixture cool, then stir in the buttermilk.
  4. In another bowl, using an electric mixer at medium speed, beat the butter and oil together until light and fluffy.  Add the sugars and beat until creamy.  Beat in the eggs, one at a time, beating well after each addition.
  5. Sift together the flour, baking soda, and salt.  Add one-third of the flour mixture to the batter and beat at low speed for a few seconds, just until combined.  Beat in half of the chocolate-buttermilk mixture, again beating just a few seconds until combined.  Scrape the sides of the bowl with a rubber spatula.  Beat in another one-third of the remaining flour mixture for no more than a few seconds, just until combined.  Add the remaining chocolate-buttermilk mixture, beating for just a few seconds.  Scrape down the bowl.  Fold in the remaining one-third of the flour mixture by hand, using a spatula, just until no streaks of flour remain.
  6. Divide the batter into the two cake pans.  Bake until a toothpick comes out clean, 25-30 minutes.  Transfer onto wire racks to cool.  Let cool completely before frosting.
  7. Half each layer horizontally using a long serrated knife for a total of 4 layers.  Top each layer with mousse buttercream and then use the remaining buttercream to frost the top and sides of the cake.  
To make the Chocolate Mousse Buttercream-
  1. Whisk together the eggs, sugar, and cocoa powder in a metal bowl.
  2. Fill a large saute pan or skillet with water and bring to a simmer.  Place the bottom of the metal bowl in the simmering water and whisk the egg mixture constantly until the sugar is completely dissolved and the mixture is thick and fluffy and very hot, 3–4 minutes.  Use an instant read thermometer to check the temperature of the mixture.  It should be between 120 and 140 degrees.
  3. Remove the bowl from the simmering water and using the whisk attachment, beat the eggs until they are tripled in volume and form soft peaks and the bottom of the bowl is completely cool to the touch, about 10 minutes.  Beat in the vanilla and salt.
  4. While the eggs are mixing, unwrap the individual sticks of butter and re-wrap them loosely in plastic wrap.  Pound the butter 5–6 times with a rolling pin, or until the butter is soft and malleable but still cool.
  5. While the mixer is still on medium high, add the butter approximately 2 tbs at a time, to the egg mixture, beating each addition until it is incorporated.  Don't start to panic if the buttercream seems too liquidy or looks curdled as you beat in the butter.  It will magically emulsify into a smooth, creamy frosting by the time the last bit of butter is mixed in.
  6. When the buttercream is smooth and glossy with a subtly brown tint from the cocoa powder, turn off the mixer and using a rubber spatula, carefully fold in the melted chocolate.


Friday, April 13, 2012

Spring Supper

Spring is here in NYC and we have been trying to take advantage of all the opportunities to be outdoors.  This is a light, delicious Spring dinner - enjoy it indoors or out!
Drink...

Moscato Spritzer 
*recipe from Make It, Bake It, Create It
This is a refreshing Spring drink.  Because it is so sweet, I think it would be perfect for a brunch, a luncheon, or a bridal/baby shower.  
Ingredients:
  • Moscato wine
  • Diet Sprite (I used Diet 7up)
  • Frozen whole raspberries
Directions:
  1. Put a handful of frozen raspberries in the bottom of a wine glass.
  2. Combine equal parts of wine and Sprite (I would suggest using a little less Sprite, since the wine is already really sweet).  
  3. Stir and sip!
Dinner...
Pasta Primavera
*recipe adapted from Mama Grubs Grub
In case you didn't know, Primavera means Spring.  So, this is Spring pasta!  The original recipe uses different veggies than I used (I made it with asparagus, bell peppers, green beans, onion, and tomatoes).  The great thing about this pasta is that you can pretty much put any vegetables into it.  Use whatever you have leftover or whatever is your favorite.
Plus, you can enjoy this dinner while working toward your Summer swimsuit body because it's only 250 calories per serving.  I looked up other recipes and they were higher calories.  You wouldn't know it from tasting this pasta though - it's delicious! (I thought maybe the addition of a little garlic would be good, but I love garlic in everything)
Ingredients: 
All my veggies
  • Linguine (I used whole wheat Rotini)
  • 2 teaspoon olive oil 
  • 1 cup chopped onion 
  • 1/2 teaspoon cracked black pepper 
  • 1 cup chopped organic carrots 
  • Asparagus  
  • 1/2 cup water 
  • 1 organic small red bell pepper,julienned  
  • 1 cup sliced organic mushrooms 
  • 1 cup organic vegetable broth (I used chicken broth) 
  • 2 teaspoon cornstarch 
  • 1/4 cup organic half and half
  • The colors in this pasta are beautiful!
  • 1/4 cup Parmesan
Directions:
  1. Cook the pasta according the package.
  2. Heat the oil in a large saute pan over medium high heat. 
  3. Add the onion and saute for 3 mins or until soft. Add the black pepper.
  4. Add the carrot and asparagus to the pan and saute to coat with seasonings. add the water,cover and allow the veggies to steam for 4 mins or until carrots begin to soften.
  5. Add the red bell pepper and mushrooms and stir. 
  6. Add the broth to the pan. 
  7. Whisk the cornstarch into the half and half, and add to the pan. 
  8. Cook for 4 mins or until the sauce thickens up toss in the pasta stir to coat.
  9. Add the Parmesan cheese to the mix and toss well.
Dessert...
Bird Nest Treats
*recipe adapted from The Curvy Carrot
 These were so easy to make and really cute.  Plus they tasted great.  They are perfect for Spring and would be really great for Easter too.  They include Cadbury Mini Eggs, my other favorite Spring candy (last week I mentioned the other one - Cadbury Cream Eggs).  I took the peanut butter out of the recipe because Doug doesn't like peanut butter (I know, I think the same thing...how could you not like peanut butter???).  They were still great, but would be even better with the peanut butter!
Ingredients:
  • 1 tablespoon of unsalted butter, for greasing the muffin pan (I just sprayed the pan with Pam and it worked well)
  • 6 ounces (1/2 bag) of semi-sweet chocolate chips
  • 6 ounces (1/2 bag) of butterscotch chips
  • 1 cup creamy peanut butter
  • 6 ounces (1/2 of a large bag) of chow mein noodles
  • 36 mini Cadbury Mini eggs
Directions:
My nests in the muffin tin
  1. Generously grease the wells of a muffin pan with the butter (this will help later when you are taking out the chilled nests).  Or, spray it with Pam like me!
  2. In a large microwave-proof bowl, heat the chocolate and butterscotch chips in 30 second intervals until thoroughly melted, stirring after each increment.**It only took me two 30-second intervals.
  3. Once melted, add the peanut butter to the chocolate/butterscotch mixture, mixing well until smooth and completely combined.
  4. Carefully add the chow mein noodles, stirring with a wooden spoon or rubber spatula, until completely coated.
  5. Using a large spoon, mold the mixture into the wells of your muffin tin, indenting the tops slightly with the back of the spoon.
  6. Chill the nests until hardened, about 1 hour or so.
  7. Once chilled, gently remove the nests from the muffin tin.***I used a butter knife as a lever to pop them out-this seemed to work.
  8. Place three eggs (or colored jelly beans!) on the tops of each nest.  (I actually put the eggs in the nest while the chocolate was still melted.  That way, when it hardened, the eggs didn't fall out.)