Search this blog

Saturday, December 17, 2011

A Very Merry Dinner!

The holidays are my favorite time of year, and there is nothing I love more than Christmas!  My family does not eat a traditional Christmas dinner (we usually have beef tenderloin, potatoes, and vegetables).  But, for the blog I wanted to try to make a typical Christmas dinner.  I did a little research and found that a lot of people eat turkey and stuffing for Christmas (which seems strange to me because we just had that meal at Thanksgiving)!  I am too intimidated to cook meat with bones in it (especially since I don't have the right cooking materials for that), so I decided to modify the dinner slightly.  I thought maybe they would have some kind of boneless turkey breast roast, but I couldn't find that (maybe it doesn't exist, but I think it should), so I decided to go with a pork tenderloin.  I used the same spices and herbs that I would have used on turkey and it turned out great (even though it probably would have tasted slightly better on turkey).

Drink...

Christmas Cocoa
This is a delicious holiday drink!  I would love to snuggle up by the Christmas tree with this!
Ingredients:
(serves 1)
  • 8 oz hot chocolate
  • 2 oz Baileys Irish cream (I used the original Baileys, but the one with mint in it would be extra good here!)
  • whipped cream
  • crushed peppermint candy
Directions:
  1. Prepare the hot chocolate. 
  2. Add Baileys.
  3. Top with whipped cream and crushed peppermints.
Dinner...
Roasted Pork Tenderloin with Holiday Stuffing
I was very impressed with myself after making this meal because it involved cooking a lot of things I have never made before.  It was pretty easy and it turned out soooo good!
Roasted Pork Tenderloin with Perfect Gravy
*recipe adapted from Disney Family
Like I said earlier, this would probably be slightly better on turkey, but it was still super good on pork and very easy.
Ingredients:
(serves 2-3)
  • 1 lb pork tenderloin
  • 1/2 tablespoon salt
  • 1 1/2 teaspoon dried sage
  • 1 teaspoon dried rosemary
  • 1 teaspoon dried thyme
  • grated zest from one orange
  • 1/2 stick butter, softened
  • gravy
    • 1/4 cup dry white wine
    • Drippings from pork
    • 1/8 cup flour, whisked into 1/2 cup of chicken stock until smooth
    • 1 1/2 cups chicken stock
    • Salt and pepper 
Directions:
  1. Mix salt with herbs and zest and rub liberally on the pork tenderloin.
  2. Place pork in a large Ziplock bag or wrap in foil. Refrigerate for 24 hours.  ( I only refrigerated mine for about 5 hours and it was still great).
  3. Remove pork from fridge and let sit at room temp for at least a half hour before roasting.
  4. Preheat oven to 350 degrees. 
  5. Rub entire surface of the pork with softened butter, and place on a rack in a roasting pan.  Put it on the lower oven rack. 
  6. Roast for about 35-45 minutes. 
  7. Remove pork to a carving board, and cover with foil and allow to rest for up to 30 minutes. 
  8. Make gravy: 
    1. Place roasting pan over two burners on the stove. There should still be some brown bits clinging to the pan.
    2. Turn heat to medium, then pour in wine, scraping up all those brown bits. 
    3. Add flour/stock mixture and stir constantly until gravy thickens, about 5 minutes. Add more turkey stock to thin gravy as necessary, turn burners to low, and continue to stir occasionally until you are ready to pour into a serving vessel.
    4. Taste for seasonings. You probably won't need to add salt, but a good pinch of pepper will be necessary.
  9. Carve pork and serve immediately.  
Holiday Stuffing*recipe adapted from AllRecipes.com
I love stuffing and I think this was one of the best I have ever had!  I really wanted to use roasted chestnuts in it, but they were ridiculously expensive, so I went with chopped walnuts instead.  Next time I will try the chestnuts to make it even more Christmas-like!
Ingredients:
(serves 4-5)
  • 2 1/2 cups cubed white bread
  • 1/2 pound ground turkey sausage (I used Trader Joe's smoked Chardonnay Apple Chicken Sausage and it was perfect!)
  • 1/2 chopped onion
  • 1 1/4 teaspoons dried sage
  • 3/4 teaspoon dried rosemary
  • 1/4 teaspoon dried thyme
  • 3/4 Granny Smith apple, cored and chopped
  • 1/2 cup dried cranberries
  • 1/4 cup chopped walnuts (or chestnuts)
  • 1/4 cup dried parsley
  • 1 cup chicken stock
  • 2 tablespoons unsalted butter, melted
Directions:
  1. Preheat oven to 350 degrees. 
  2. Spread the bread cubes in a single layer on a large baking sheet. Bake for 5 to 7 minutes in the preheated oven, or until evenly toasted. Transfer toasted bread cubes to a casserole dish.
  3. In a large skillet, cook the sausage and onions over medium heat, stirring and breaking up the lumps until evenly browned. Add the  sage, rosemary, walnuts, and thyme; cook, stirring, for 2 minutes to blend flavors.
  4. Pour sausage mixture over bread. Mix in chopped apples, dried cranberries, and parsley. Drizzle with chicken stock (you may not need all the stock.  Just enough to make the bread moist but not soaked) and melted butter, and mix lightly. 
  5. Cover with aluminum foil and back for 40 minutes.
  6. Uncover the stuffing and bake for an additional 20 minutes.

Dessert...

Candy Cane Cookies
*recipe from Kraft
These are the perfect end to a Christmas dinner!
Ingredients:
(makes about 4 1/2 dozen cookies)


  • 1 pkg. (8 oz.) Cream Cheese, softened 
  • 3/4 cup  butter, softened  
  • 1 cup sugar  
  • 2 tsp.  vanilla  
  • 2-1/2 cups flour  
  • 1/2 tsp.  baking soda  
  • 4 squares Semi-Sweet Chocolate, melted  
  • 1 pkg. White Chocolate Chips, melted  
  • 12 hard peppermint candies, crushed
Directions:
  1. Heat oven to 350 degrees.
  2. Beat first 4 ingredients in large bowl with mixer until blended. Add flour and baking soda; mix well. Blend in melted chocolate. (Dough will be stiff.) 
  3. Roll tablespoonfuls of dough into 52 balls; roll each into 3-inch-long rope. Place, 2 inches apart, on baking sheets, bending top of each slightly to resemble candy cane. 
  4. Bake 10 to 12 min. or until puffed and set; cool 5 min. on baking sheets. Remove to wire racks; cool completely. 
  5. Melt white chocolate; drizzle over cookies. Sprinkle with crushed candy. Let stand until chocolate is firm.  

Friday, December 9, 2011

And I'm Back...With An Italian Feast!

After a long hiatus I am back to blogging!  We finally got a new stove and I can cook again.  This was the meal I was going to make before our oven broke, so I figured I would try again.  Enjoy some delicious Italian food!
Drink...


Amaretto Mocha Italia
*recipe from Disaronno
This drink was quite delicious on a cool, fall day.  Be careful though, because I put a bit too much amaretto in mine and it tasted a little strong.  I would start out with less amaretto...you can always add more :)
Ingredients:
(Makes one drink)
  • 8 oz. hot coffee
  • 2-3 oz. amaretto (depending on taste)
  • 1 tsp. instant hot cocoa mix
  • Whipped cream
  • Shaved chocolate
Directions:
  1. Stir hot cocoa mix into the hot coffee until it dissolves.
  2. Add the amaretto.
  3. Top with whipped cream and chocolate shavings. 
Dinner...
Eggplant Parmesan
*Recipe from Maureen K.
I have made other eggplant parmesan recipes that are quicker and simpler, but none are as good as this one.  It is well worth the time it takes to prepare it!
Ingredients:
(serves 4)
  • 1lg or 2 med eggplants (small white, light pink/purple are great if you can find them!  
  • For flour coating: mix together in a shallow bowl and set aside:
    •  1 to 2 cups of flour (depending on the amount of eggplant slices you are cooking) 
    • 1 to 2 tbs garlic powder -  again depending on eggplant amount 
    • 2 tsp.salt (or more)
    • 1 tsp pepper (or more)
  • For egg wash coating: in shallow bowl mix and set aside: 
    • 2 slightly beaten eggs(more if needed), diluted with 2 teaspoons to a tablespoon of water for each egg used.
    • stir these ingredients together with 10 to 12 mild strokes. don't let the eggs get bubbly, as this makes the coating uneven.
  • For bread crumb coating: in shallow bowl mix and set aside: 
    • about 3/4 c of plain bread crumbs for every diluted egg (I used panko bread crumbs because that was what I had, and it worked well.)
    • about 1/3 c of grated parmesan cheese (or a little more) for every diluted egg 
  • 1 large jar (or more) of your favorite spaghetti sauce
  • mozzarella cheese slices
  • vegetable or olive oil
Directions:
breaded eggplants waiting to be fried
  1. Peel eggplant and cut into 1 to 1 1/2" thick circles. 
  2. Salt slices and place in a colander over a bowl or in the sink for 30 minutes. Eggplant is very watery and will dilute sauces. If your spaghetti sauce is thick this step can be eliminated. 
  3. After salted, rinse salt off of the eggplant and pat slices dry w/paper towel.
  4. Flour each piece of eggplant, tossing it lightly from one palm to the other, patting gently all over and letting any excess flour fall off. 
  5. Put the flour coated piece into the egg mixture, making sure the entire surface is covered. Allow any excess egg to drip off. 
  6. Place the slice in the bread crumb bowl. Make sure that the crumbs adhere evenly to the shallow sides of the eggplant as well as the large tops and bottoms of the eggplant. If you see any vacant places sprinkle a few crumbs on them. gently pat the crumbs to adhere. Handle the eggplant gently, so that the coating won't crack.
  7. Place pieces on a rack to dry for about 20 minutes before frying. Keep prepping the eggplant slices. after 15 - 20 minutes all the remaining eggplant slices will be done and you can start frying the first slices that were coated. 
  8. Preheat oven to 350.
  9. Heat 1/2 inch of oil in large non-stick skillet.  Place eggplant pieces in heated oil (do not crowd pieces). Brown on all sides, being careful not to burn coating as the cheese in the coating mixture will burn if not attended to. remove from pan and place on cookie sheet,continue browning remaining pieces.
  10. Pour 1 to 1 1/2 inches of sauce on bottom of casserole. Add a layer of eggplant using larger pieces for bottom. Top each bottom piece with another piece (a stack of 2-3!). Add remaining spaghetti sauce, covering the bottom layer and coming 1/2 of the way up top layer.
  11. Cover casserole and bake 30 to 40 minutes or until sauce is bubbling.
  12. Remove casserole from oven and turn oven temperature up to 425 to 450.  
  13. Place 1 large piece of mozzarella on top of each eggplant stack. 
  14. Place casserole (without cover on!) back in the oven and heat until cheese melts and browns a little, approx. 5-10 min depending on your oven. watch closely as cheese may melt to fast and just run off of your eggplant!
  15. Let cool a little and enjoy!
Garlic Bread

This garlic bread is so easy to make, and so much tastier than store-bought garlic bread!
Ingredients:
  • A crusty loaf of bread
  • 2 cloves of garlic
  • 2 tbs butter
  • Parsley
  • Parmesan cheese
Directions:
  1. Cut the loaf of bread in half lengthwise.
  2. Melt butter.
  3. Chop garlic and add it to the melted butter.
  4. Brush the butter/garlic mixture on the bread.
  5. Sprinkle with parsley and parmesan cheese.
  6. Bake in a 425 degree oven for 6-7 minutes or until golden brown.
  7. Slice the bread into pieces.
Dessert...
Easy Tiramisu
*Recipe from Pina D.
I got this recipe from a woman I worked with in Los Angeles.  It is so delicious, so easy, and such an impressive dessert.  It will look and taste like you spent a lot of time making it, but really it doesn't take much time at all.  It's sure to impress any guests!
Ingredients:
(makes about 16 servings)
  • 8 ounces Cream Cheese
  • 3 cups cold milk
  • 2 packages (4-serving size each) Jello Vanilla Flavor Instant Pudding & Pie Filling
  • 1 Tub (8 ounces) Cool Whip Whipped Topping, thawed, divided
  • 48 Nilla Wafers (I use a bit more, about 1 1/2 boxes)
  • 1/2 espresso coffee, cooled, divided
  • 2 squares Semi-Sweet Chocolate, coarsely grated (2 ounces)
  • 1 cup of fresh raspberries
Directions:
  1. Beat cream cheese in large bowl with electric mixer until creamy.
  2. Gradually beat in milk. 
  3. Add dry pudding mixes; mix well. 
  4. Stir in 2 cups of the Whipped Topping. 
  5. Line bottom and sides of a 2 1/2 quart bowl with half of the wafers (I used a Trifle bowl); drizzle with half of the coffee. 
  6. Layer half of the pudding mixture over wafers, and then top with half of the grated chocolate. 
  7. Repeat all layers starting with the wafers and coffee. 
  8. Top with raspberries, and grated chocolate. 
  9. Refrigerate overnight. 
Cin Cin
(cheers) 
Try the recipes...I guarantee you will enjoy them!

Monday, November 14, 2011

Magnificent or Mediocre? A Microwave Dinner that is Both.

I haven't written in a while because the gas in our apartment building has been (and still is) shut off.  There was a gas leak...the soonest ConEd could come fix it was in 4 months...we are getting new electric stoves in the meantime...but when?  Who knows!  
I have missed blogging and cooking, so I decided to try a microwave dinner.  I wanted to make things that you wouldn't usually think of making in the microwave.  You will have to read on to see how it went...
Drink...
White Wine (Pinot Grigio)
I Googled what drinks go best with risotto and all that came up was wine.  So, I thought...well, if that's the best...that makes it easy for me!
However, this choice did not turn out quite as boring as I thought it would be.  There ended up being a story to this wine...
Just a couple days before, Doug and I had a conversation about how, due to some strange law, you can not buy wine at a grocery store in NYC (only beer).  When I went out shopping for ingredients I was annoyed.  We had already been to one store, I was on my way to another store, and then I would have to go to the wine store (that's the other thing about NYC - you can not get all the ingredients you need in one store - it requires you going to at least 2-3).  So, here I am walking around Food Emporium (store #2) and there I see it...wine!!  I was so excited that I would not have to go to another store and I could prove Doug wrong at the same time, so I bought the wine.
I started cooking with it and Doug asked for a glass.  So, I poured him a one and he said, "Wow, this wine is really sweet."  I thought, oh, that's good.  I like a sweeter wine.  Then he said, "No, really it tastes like juice."  He proceeded to go in the fridge and look at the bottle.  That's when we found out it was not wine, but "a wine product."  It had alcohol in it, but a very low percentage and it tasted pretty disgusting, even to someone who likes sweet wine.  Moral of the story:  Do NOT buy "wine" at a grocery store in NYC.

Dinner...
Asparagus Risotto and Chicken with Pesto Sauce
Chicken with Pesto Sauce (Mediocre)
This chicken was not bad...just nothing to write home about. 
Ingredients:
  • 2 boneless breaded chicken breasts (I used Trader Joes pre-cooked frozen ones)
  • 2 tbs. pesto sauce
  • 1 tbs. butter
Directions:
  1. Microwave chicken breasts for 2 1/2 minutes. 
  2. Melt butter and mix with the pesto sauce.
  3. Top the chicken breast with pesto.
Asparagus Risotto (Magnificent)
*Recipe adapted from allrecipes.com
This recipe was amazing to me.  It was almost like magic the way it cooked in the microwave.  Believe it or not, I have never had risotto before.  But, I must say this tasted pretty good to me!
Ingredients:
  • 3 tablespoons butter
  • 1 clove garlic, minced
  • 1 onion, chopped
  • 2 cups chicken broth
  • 1 cup uncooked Arborio rice
  • 3/4 cup white wine
  • 1/4 cup grated Parmesan cheese
  • 1 cup cooked, cut asparagus
  • 2 Roma tomatoes
Directions:
  1. In a large microwave safe bowl combine butter, garlic and onion. Place dish in microwave and cook on high for 3 minutes.
  2. Place chicken broth in a microwave safe dish. Heat in microwave until the broth is hot but not boiling (approximately 2 minutes).
  3. Stir the rice and broth into the bowl with the onion, butter and garlic mixture. Cover the dish tightly and cook on high for 6 minutes.
  4. Stir wine into the rice. Cook on high for 5 minutes.  Add the asparagus and tomatoes and cook 5 minutes more. Most of the liquid should boil off. Stir the cheese into the rice and serve. 

Dessert:

Mini-Moist Vanilla Cake (Miserable)
*recipe from: Delicious Microwave Recipes
This cake sounded too good to be true.  I mean, how can you make a cake in the microwave?  But, it looked so good in the picture on the website, I just had to try it.  I found out that some things are not meant to be made in the microwave.
I had high hopes for the cake as it started rising in the microwave.
The taste of the cake was ok, I guess.  But it was a very strange texture.  Also, even though it's vanilla cake, it turned out brown.  I think maybe I overcooked it.  But. it did not seem done after the amount of time the recipe said.  Here's the recipe in case you want to see how weird it was.  Or, maybe you will have better luck than me!
Ingredients:
  • 1/4 cup all-purpose flour
  • 1/4 cup white sugar 
  • 2 tablespoons milk
  • 1 tablespoon white vinegar 
  • 3 tablespoons applesauce
  • 1/2 teaspoon baking soda
  • 1 tablespoon vanilla extract
  • 1 egg
  • 1 can of chocolate frosting
 Directions:
  1. Combine the flour, sugar, milk, vinegar, applesauce, baking soda, and vanilla extract together by whisking vigorously, until smooth. 
  2. Next, beat in the egg. 
  3. Spray a large cereal bowl with non-stick cooking spray, and pour  the smooth batter into the cereal bowl (may fill more than one bowl, just pour into multiple bowls until mix is gone).
  4. Baking one bowl at a time, place it in the microwave on high for 2 to 4 minutes, until a toothpick comes out clean.  
  5. Let cool before serving or frosting!
 And the Results...
One thing I made in the microwave was really good and I would probably make it again (especially in the summer when you don't want to heat up the house by using a stove or oven).  But, I am not converted to a microwave chef and hopefully I will be back to cooking with a stove/oven soon! 

Sunday, October 16, 2011

No Gas = No Good Food

I was planning on making a delicious meal this weekend and adding another post to my blog, but our gas has been shut off in our apartment for the past 6 days due to a leak.  I never realized how much I use the stove/oven until now.  Hopefully it will be back on soon - otherwise the theme for my next post might have to be drinks, dinner, and dessert à la microwave!

Saturday, October 8, 2011

A Rosh Hashanah Dinner

I had a couple days off for Rosh Hashanah, so even though I am not Jewish, I was inspired to make some traditional Rosh Hashanah food.  I found that a lot of the food was simple to make, but very time-consuming.  So, if you decide to do any of these recipes, be sure to plan ahead!
Drink...
Pomegranate Sangria
*Recipe from The Shiksa In The Kitchen
This drink is not traditional for Rosh Hashanah, but it has a lot of holiday symbolism in it.  There is honey (in honor of a sweet new year), pomegranate (to symbolize a "new fruit" and the 613 Mitzvot because there are supposedly 613 seeds), grapes (a round fruit to represent the cyclical nature of the year), and apples (traditionally eaten with honey to symbolize a sweet new year).  Along with all the symbolism, it is really, really tasty too!
Ingredients:
(Serves 6-8)
  • 1/2 cup honey
  • 1 pomegranate
  • 1 apple, cored and sliced thin
  • 12 oz. seedless grapes
  • 1 bottle red wine (syrah/shiraz works well)
  • 2 cups pure 100% pomegranate juice
  • 1 cup grape juice (I didn't want to buy two different juices, so I used Trader Joe's Triple Berry juice in place of the pomegranate and grape juices.  It is a blend of pomegranate, blueberry, and cranberry and worked really well.)
  • 1/4 cup brandy (I used cherry brandy)
  • 1/4 cup triple sec
 Directions:
  1. Pour the honey and ½ cup water into a small saucepan. 
  2. Heat over medium, stirring constantly, until the honey is completely dissolved into the water. Do not boil. 
  3. Remove from heat and allow to cool. This is your honey simple syrup.
  4. Seed the pomegranate.
  5. Place the pomegranate seeds, grapes, and apples in the bottom of a pitcher.
  6. Pour the entire bottle of wine into the pitcher.
  7. Add the juice, brandy, triple sec, and honey simple syrup to the pitcher. Stir to blend all the flavors together.
  8. Refrigerate for at least 2 hours.  Stir again prior to serving. 
Dinner...
Brisket with Tzimmes
*Recipe from Epicurious
This is a really good recipe.  The meat is so tender it just falls apart.  Tzimmes is a traditional Jewish sweet stew with carrots, prunes, and other root vegetables.  But, once again, it cooks for a VERY long time, so prepare ahead!
Ingredients:
(Serves 4-5)
  • 1 (3- to 4-lb) brisket
  • 3/4 teaspoons salt
  • 1/2 teaspoon black pepper
  • 3 tablespoons olive oil
  • 4 cups chicken stock
  • 3/4 cup Sherry vinegar ( couldn't find this so I used red wine vinegar)
  • 1 lb carrots, peeled and cut crosswise into 2-inch-long pieces (I just used baby carrots)
  • 1 medium sweet potato, peeled and cut into 2-inch pieces
  • 1 medium regular potato, peeled and cut into 2-inch pieces
  • 1 1/4 cups dried pitted prunes
Directions:
  1. Preheat oven to 350°F.  
  2. Pat brisket dry and rub all over with salt and pepper. 
  3. Heat oil in a heavy roasting pan over moderately high heat until hot but not smoking. 
  4. Brown brisket, starting with fat side down, on both sides, about 5 minutes per side. 
  5. Remove from heat, then add stock and vinegar to pan. 
  6. Cover pan tightly with heavy-duty foil and braise brisket in oven 2 hours. 
  7. Add carrots and potatoes to pan and braise, covered, 1 hour. 
  8. Add prunes and braise, covered, 30 minutes more. 
  9. Cool meat, uncovered, to room temperature, about 1 hour. 
  10. Chill, covered, at least 12 hours.
  11. Preheat oven to 350°F.  
  12. Transfer brisket to a cutting board and slice across the grain about 1/4 inch thick. 
  13. Return sliced meat to pan and reheat, covered with foil, until heated through, about 40 minutes. 
  14. Sprinkle with more salt and pepper, then arrange meat with tzimmes and sauce on a large platter. 
Challah Bread
*Recipe from Epicurious
This bread is okay, but takes a long time to make.  Even though it was a good experience making my own bread, I think I'll stick to store-bought Challah Bread in the future :)
Ingredients:
(Makes 1 Challah loaf)
  • 1 teaspoon instant yeast (I followed the reviews I read and added more yeast to help it rise.  I used 1 1/2 tsp total)
  • About 1 3/4 cups flour
  • 1/8 cup warm water
  • 3 large eggs
  • 3/4 teaspoons salt
  • 1/8 cup vegetable oil
  • 1/8 cup honey or 1/6 cup granulated sugar (I read reviews saying the bread wasn't sweet enough, so I used 1/8 cup of honey plus 2 tbs. sugar.)
Directions:
  1. In a large bowl, whisk together the yeast and 1/8 cup of the flour. 
  2. Whisk in the warm water until smooth. 
  3. Let the yeast mixture stand uncovered for 10 to 20 minutes, or until it begins to ferment and puff up slightly.
  4. Whisk 2 of the eggs, salt, oil, and honey or sugar into the puffed yeast mixture until the eggs are well incorporated and the salt has dissolved.
  5. With your hands or a wooden spoon, stir in the remaining flour all at once. 
  6. When the mixture is a shaggy ball, scrape it out onto your work surface and knead it until smooth, no more than 5 minutes. This dough is very firm and should feel almost like modeling clay. If the dough is too firm to knead easily, add a tablespoon or two of water to it; if it seems too wet, add a few tablespoons flour. (My dough never got firm like clay even though I added quite a bit more flour.  Mine was very sticky, but it still worked.) 
  7. Place the dough in a warm clean bowl and cover it with plastic wrap. 
  8. Let the dough sit until it has at least doubled in size, about 2 hours.  (I followed reviews and to help it rise I boiled a pot of water, placed the pot of hot water in the bottom of the oven and then with the oven turned off, put the dough on a rack above the hot water to keep it warm.) 
  9. Grease a large baking sheet.  
  10. Divide the dough into two portions.
  11. Twist and braid the dough together.
  12.  Cover the loaves well with plastic wrap.
  13. Let them sit until tripled in size, about 2 hours (I did the same trick with the hot water in the oven).  
  14. Preheat the oven to 325°F.
  15. Beat the remaining egg with a pinch of salt for glazing the bread.
  16. Brush the dough with the egg glaze.
  17. Bake rolls for about 15 to 20 minutes, until very well browned.
    Dough before 2nd rise

    Dough after 2nd rise

    Finished, baked dough
     
Dessert...
 Honey Cake
*Recipe from Smitten Kitchen
This cake is really good.  It is kind of like a spice cake.  I think it would be even better with ice cream or whipped cream.
Ingredients:
(Makes one loaf-sized cake)
  • 1 3/4 cups flour
  • 1/2 teaspoon baking powder 
  • 1/2 teaspoon baking soda
  • 1/4 teaspoon salt
  • 2 teaspoons ground cinnamon
  • 1/4 teaspoon ground cloves
  • 1/4 teaspoon ground allspice
  • 1/2 cup vegetable oil
  • 1/2 cup honey
  • 3/4 cup granulated sugar
  • 1/4 cup brown sugar
  • 2 large eggs at room temperature
  • 1/2 teaspoon vanilla extract
  • 1/2 cup warm coffee 
  • 1/4 cup orange juice
  • 1/8 cup whiskey
  • Powdered sugar for dusting
Directions:
  1.  Preheat oven to 350°F. 
  2. Spray a loaf pan with non-stick cooking spray.
  3. In a large bowl, whisk together the flour, baking powder, baking soda, salt, cinnamon, cloves and allspice. 
  4. Make a well in the center, and add oil, honey, white sugar, brown sugars, eggs, vanilla, coffee, orange juice and whiskey.
  5. Using a strong wire whisk or in an electric mixer on slow speed, stir together well to make a thick, well-blended batter, making sure that no ingredients are stuck to the bottom.
  6. Spoon batter into prepared pan.
  7. Bake until cake tests done, that is, it springs back when you gently touch the cake center, about 45 to 55 minutes.
  8. Let cake stand fifteen minutes before removing from pan.
  9. Dust with powdered sugar before serving.
Shana Tova!

If you are like me and never made any of these foods before, enjoy, because they are delicious!  I learned a lot about Rosh Hashanah while making this meal and was able to eat some new food in the process, which is always a good thing!

    Sunday, September 25, 2011

    Prost! (Cheers!) to Oktoberfest!

    Get out your Lederhosen and celebrate Oktoberfest!  Oktoberfest  is a 16-18 day beer festival held in Munich, Germany.  It is the world's largest fair and begins at the end of September and goes until the first weekend in October.  For this meal, I made all traditional German Oktoberfest foods. "O'zapft is!" is the phrase the the Mayor of Munich shouts out at the beginning of Oktoberfest, meaning "It's tapped!"
    Drink... 
    *Chosen and written by Doug W.
    Oktoberfest is a beer festival, so what else could we drink with this dinner besides beer?  Doug knows all about beer and chose a perfect Oktoberfest beer to go with my dinner.  Here is his description of the beer and why he chose it:
     
    Greetings from your favorite (self-anointed) beer expert!  An important part of Oktoberfest is beer (and loudly singing Ein Prosit).  But before describing the beer, a note on pairing beer and food.  The way I see it, there are three routes one can take in selecting a beer to go with a meal.  First, one might choose a beer that is likely to complement the taste of the food being served (like pairing wine with food).  Second, one can choose a seasonally appropriate brew (many styles of beer were traditionally brewed for a specific season or time of year).  Finally, the choice might be made to satisfy the theme of the meal.  Our choice certainly satisfies the second and third criteria—you can judge whether it satisfies the first.  
                 
    If you purchase an “Oktoberfest beer” here in the states you are most likely to receive what the Germans call a märzenbier.  This translates to “March beer,” as in a beer that was brewed in the month of March.  Beer brewing is an old pastime and thus many of the seasonal brewing traditions reflect the necessities of pre-modern life, and märzen is no different.  Before widespread air conditioning, brewing lagers, which require cool temperatures for good results, would cease in the spring once the outside temperatures crept up (some sources also claim summer brewing was banned to stem fires).  Märzenbier is brewed in March and stored until late September, which in Bavaria is Oktoberfest, hence its association with the famous German festival. 

                
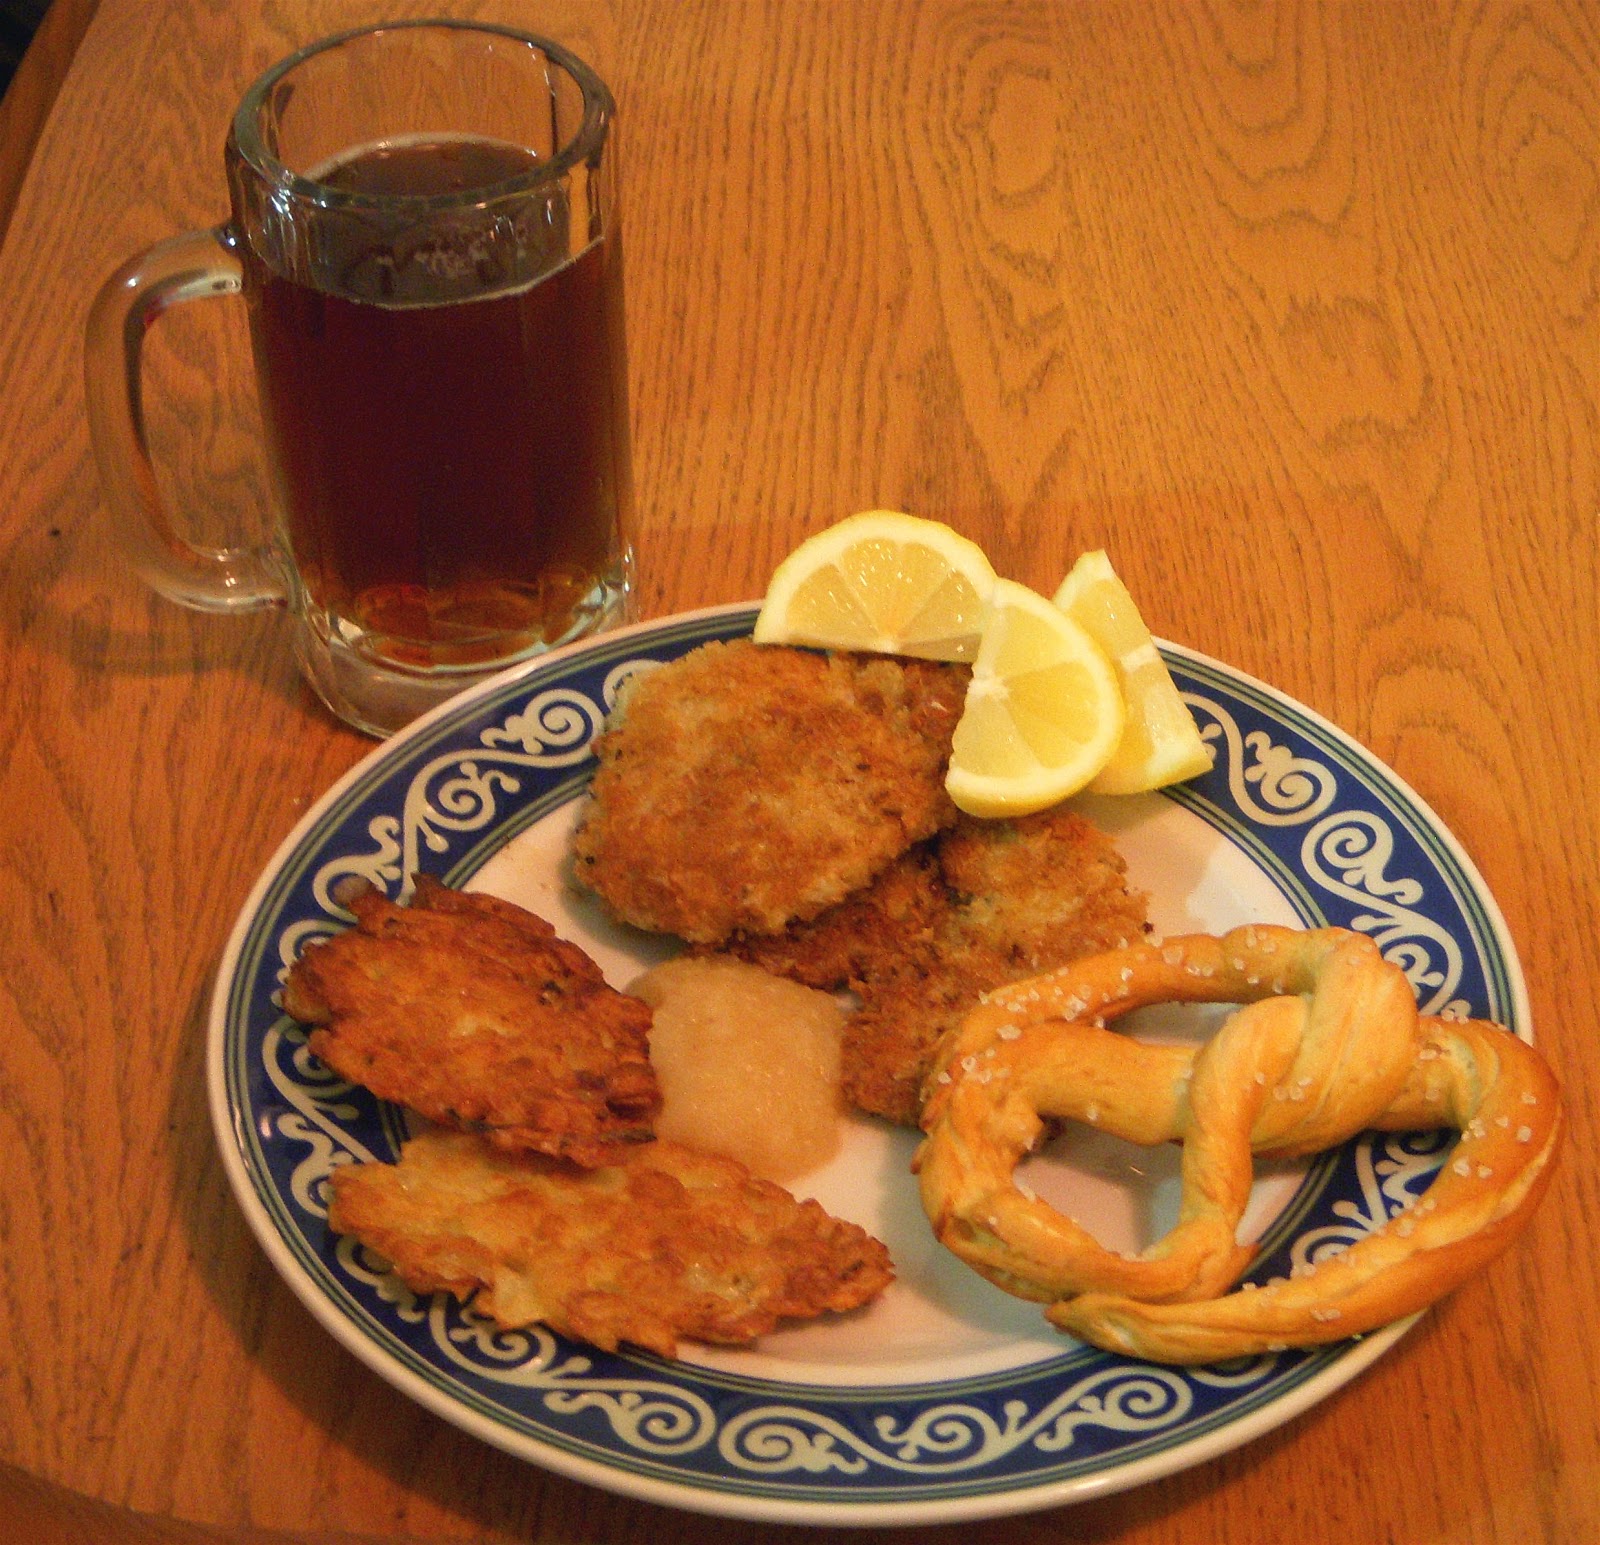
     Most Oktoberfest beer is medium brown, not very dark, but not pale.  We chose Spaten’s Oktoberfest beer for our celebration and it’s representative of the style (if you like the style, I recommend both Ayinger’s and Hacker-Pschorr’s Oktoberfest beers).  Only six breweries are allowed to serve beer at Munich's Oktoberfest, including Spaten.  Anyone who has attended Oktoberfest in Munich, or seen pictures of the same, probably noticed that most of the beer served is suspiciously pale.  Dirty little secret:  most Germans (and Oktoberfest tourists) are not beer connoisseurs, and like their American counterparts, drink only pale lager (called helles when made in the Munich style).  My advice: try a märzen if you haven’t, but drink whatever brings you Gemütlichkeit

    Dinner...
    *Recipes from: The Oktoberfest German Food Guide 
    Who needs to go to a restaurant to get traditional German food when you can make it right at home? 
    Laugenbrezeln (Laugen Pretzels)
    While making these, I learned that pretzel making is an art and not just a science.  These pretzels turned out tasty, but not the way I expected.  They were a little harder and crunchier than I would have liked.  The only way I can think of to correct this is to roll the dough thicker and bake for less time.
    Ingredients:
    (Makes 6-7 pretzels)
    For the dough:
    • 2 3/8  cups of bread flour (I did not have bread flour so I added 2 tbs more of flour per cup...maybe this is where my pretzels started to go wrong :)
    • 1/2 pkg of dry yeast (3.5 oz)
    • 1/2 tsp. sugar
    • 1/2 tsp. salt
    • 1/2 cup of lukewarm milk
    • 1 tbs. coarse salt (I used sea salt)

    For the soda water:

    • 2 cups water
    • 1/2 tbs. salt
    • 1/2 tbs. baking soda
    Directions:
    1. Create a "starter" by mixing milk, yeast, sugar, and 2 tablespoons of flour. The consistency of the Starter should be like a watery pancake batter. 
    2. Let sit for 15 minutes. Small bubbles should begin to form. This shows that the yeast is alive.
    3. To the Starter, add the remaining flour and salt. 
    4. Knead until dough is smooth and soft. If dough is too dry, add a little bit more liquid. Likewise, if dough is too sticky, add a little bit more flour. (I had to add more milk)
    5. Let dough rest, covered and in a warm place, until it is double in size.
    6. Knead dough one more time to remove all air bubbles that formed during the rising period. 
    7. Divide dough into equal pieces. Roll each dough piece into a pencil-thick 11-inch string (This is where I think it should be thicker so the pretzels don't turn out crunchy). 
    8. Form each string into a pretzel.
    9. Let pretzels rest for 15 minutes, covered and in a warm place.
    10. While the pretzels are resting, prepare the soda water. Do this by combining the baking soda, water, and salt in a wide pot. Bring to a boil, then remove from heat.
    11. Drop each pretzel in the hot soda water. As soon as it rises to the surface, remove it from the soda water and place it on a baking sheet. Repeat this step for each pretzel.
    12. Sprinkle pretzels with coarse salt. 
    13. Bake for approximately 15-20 minutes in a 425°F oven (I would try baking them for a little less time so they are not so crisp).
    Kartoffelpuffer Mit Zwiebel (Potato Pancakes with Onions)
    These were good, but would be even better (and easier) if I would have had a food processor to cut the potatoes.  If you have one, use it!
    Ingredients:
    (Serves 4)
    • 3/4 lb potatoes 
    • 1/2 a small onion, finely chopped
    • 1/8 cup flour
    • 2 eggs
    • salt (to taste)
    • vegetable oil (2 tbs per potato pancake)
    • Applesauce or sour cream for topping
    Directions:
    1.  Peel and wash the potatoes. 
    2. Finely shred the potatoes into a bowl (I used a peeler to shred the potatoes, but it was very time consuming.  If you have a food processor, use it here to get the potatoes really finely shredded). 
    3. Place shredded potatoes into a clean kitchen towel. Squeeze out excess juice. Return potatoes to bowl.
    4. To the potatoes, add eggs, flour, onions, and salt. Mix together.
    5. Heat oil in a frying pan. Using about 2 tablespoons per pancake, fry pancakes in hot oil until the pancakes are crispy and golden brown. 
    6. Allow excess oil to drip off of pancakes. Serve immediately.  
    7. Top with applesauce or sour cream.
    Wiener Schnitzel
    This dish is typically made with veal, but that was a little too expensive for me, so I used pork, which worked great.
    Ingredients:
    (Serves 4)
    • 1/2 lb veal cutlets (I substituted pork cutlets)
    • 1/4 tsp salt
    • dash of black pepper
    • 1/4 cup flour
    • 1 egg
    • 1/2 cup bread crumbs (I used Panko breadcrumbs which are obviously non-traditional, but they worked great because they really crisp up nicely!)
    • 2 tbs. butter
    • 2 tbs. oil (I used olive oil)
    • 1 lemon, sliced into wedges for garnish
    Directions:
    My workstation - ready to bread the pork!
    1. Season each veal cutlet with salt and pepper (both sides). 
    2. Let stand at room temperature for 10-15 minutes. 
    3. In the meantime, prepare your work area. You will need 3 plates - add the flour to the first one, add the eggs to the second one, and add the bread crumbs to the third plate. Arrange the plates in a row, close to the stove. 
    4. Heat the butter and oil in a large, heavy skillet or pan over moderately high heat for about 2 minutes. 
    5. For each veal cutlet, coat the cutlet with flour, dunk it in the eggs, then coat it with bread crumbs. 
    6. Put the coated veal cutlet immediately in the hot skillet. Cook each side for about 3 minutes, or until each side is a deep golden brown. 
    7. Remove the schnitzel and place on a plate lined with paper towels (to absorb any extra oil). Keep warm. 
    8. Serve the schnitzels warm with lemon slices.
      Dessert... 
    *Recipes from: The Oktoberfest German Food Guide
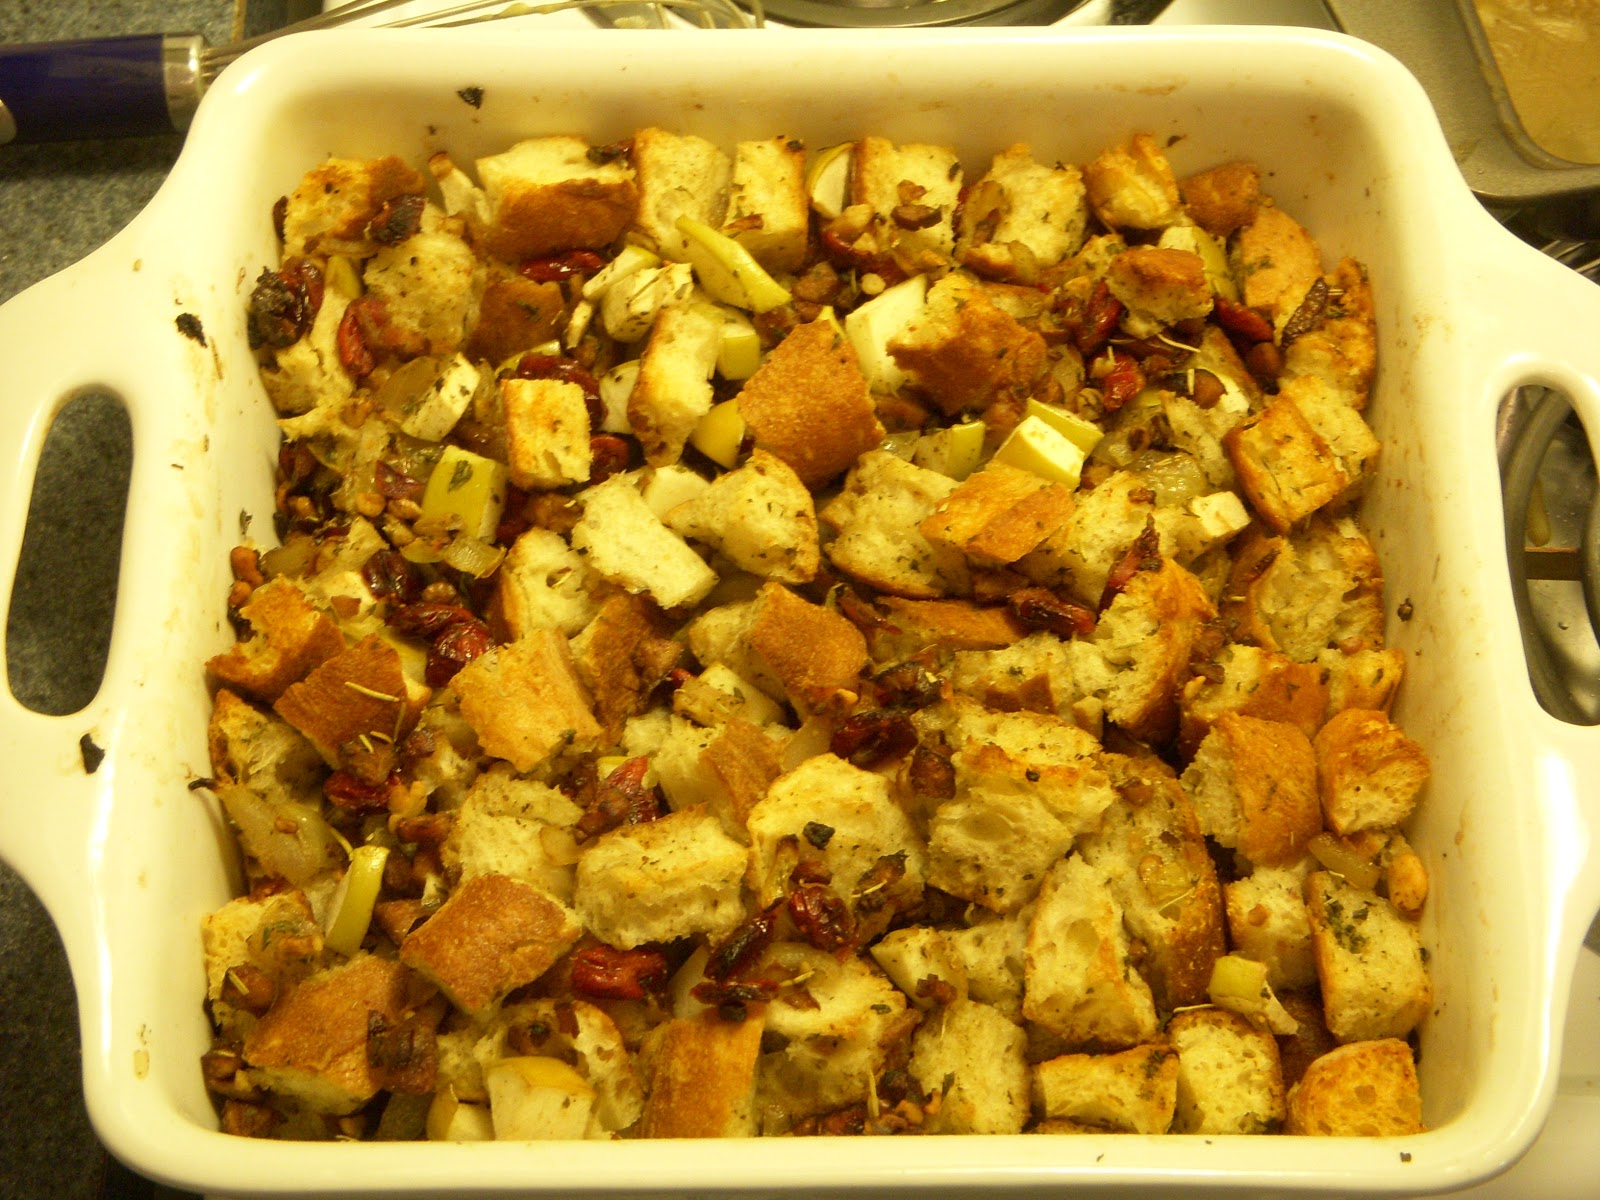
    Apfelstrudel (Apple Strudel)
    The recipe for the strudel dough seemed really complicated so I used frozen Phyllo dough as it suggested.  The Phyllo dough was a little crisp .  I'm not quite sure if that is how a strudel is supposed to be, but it still tasted really good! (I wonder if you could use a refrigerated biscuit or crescent dough rolled very thin in order to get a softer strudel crust?)
    Ingredients:
    (Serves 6)
    • 1/4 cup ground walnuts
    • 2 cups sliced and peeled apples
    • 1/2 cup raisins
    • 1/2 tsp. lemon zest
    • 1/3 cup sugar
    • 1 tsp. cinnamon (I added more...probably about 2 tsp. total)
    • Phyllo dough (or biscuit dough?)
    • 2-4 tbs. melted butter for basting
    Directions:
    1. Preheat oven to 350°F. 
    2. Grease a large sheet pan or line it with parchment paper.
    3. Combine the filling ingredients.
    4. Roll out the Phyllo or biscuit dough very thin.
    5. Spread the apple filling across the dough, leaving about a 1 1/2 inch border from the edges. Fold over the 1 1/2 inch flaps of dough to the right and left of the filling. Roll up the dough with the filling (kind of like rolling up a burrito).  Brush the outside of the dough with butter to seal it and help it bake golden brown.
    6. Poke a few small ventilation holes on the top of the strudel with a fork. 
    7. Bake the strudel for about 1 hour, basting it occasionally with melted butter, until the strudel is golden brown.
    8. Remove the strudel from the oven. Allow it to cool somewhat, then dust with powdered sugar. 
    9. Serve warm.  It would also be good served with with vanilla ice cream and whipped cream.
    Ein Prosit!
    Happy Oktoberfest!  Enjoy a meal full of good food, good beer, and hopefully good friends!

    Sunday, September 18, 2011

    A Lemon Lover's Dinner

    If you love the taste of lemons, then this dinner is for you!  None of the components are very difficult to make, but it is sure to impress everyone at the dinner table!
    Drink...
    Aviation
    The Aviation is a classic cocktail created in the early 20th century.  It traditionally consists of gin, maraschino liqueur, and lemon juice.  Some older recipes also include crème de violette.  I changed some parts of the cocktail because of the difficulty of finding ingredients, and for reasons of personal taste.  I was unable to find maraschino liqueur (although I will admit, I didn't try too hard), so I replaced it with cherry brandy, which is why my cocktail is red where it would normally be clear.  Also, Doug enjoyed his with just gin, cherry brandy, and lemon juice, but it was a bit strong for my taste, so I added some simple syrup.  This is a real, grown-up cocktail, so watch out - it is pretty strong!
    Ingredients:
    (makes 1 cocktail)
    • 2 oz. Gin
    • 1/2 oz. Maraschino liqueur (I substituted with cherry brandy)
    • 1/2 oz. Lemon juice
    • 1/2 oz. Simple syrup (if you would like a sweeter, less strong drink) 
    • Maraschino cherry
    Directions:
    1. Put the gin, maraschino liqueur, lemon juice, and simple syrup (if you are using it) into a cocktail shaker with ice.
    2. Shake and strain it into a cocktail glass.
    3. Add a cherry into the glass and enjoy!
    Dinner...
    This is one of my favorite dinners because it is pretty simple to make, but turns out really impressive (I would say restaurant-quality :).  It's a great dish to make for guests.
    Chicken Piccata
    *recipe adapted from Giada De Laurentiis
    (Serves 4)

    Ingredients:
    • 4 boneless, skinless chicken breasts sliced thinly into cutlets.
    • Salt and pepper
    • Flour for dredging
    • 12 tbs. butter
    • 10 tbs. extra virgin olive oil
    • 2/3 cup lemon juice (or to taste)
    • 1 lemon, sliced
    • 1 cup chicken stock
    • 1/2 cup capers
    • 2/3 cup parsley
    Directions:
    My chicken is browning!
    1. Season the chicken with salt and pepper.
    2. Dredge the chicken in flour and shake off the excess.
    3. In a large skillet melt 4 tbs of butter with 6 tbs olive oil.  Add half of the chicken and cook for 3 minutes or until lightly browned.  Then, flip and cook the other side until browned.
    4. Remove the cooked chicken and transfer to a plate.
    5. Melt 4 more tbs butter and another 4 tbs olive oil.
    6. Add the rest of the chicken and cook the same as before.  When finished cooking, transfer the chicken to a plate.
    7. Into the pan add the lemon juice, stock, lemon slices, and capers.  Bring to a boil, scraping up the brown bits. 
    8. Check the seasoning. (This is where I always add more lemon juice because I like mine very lemony).
    9. Return the chicken to the pan and simmer for 5 minutes.
    10. Remove the chicken from the pan to a platter.
    11. Add remaining 4 tbs of butter to the sauce and whisk vigorously.
    12. Pour the sauce over the chicken and garnish with parsley.
    Lemon-Pistachio Rice
    *Recipe from Maureen K.
    (Serves 4)

    Ingredients:
    • 2 tsp. extra virgin olive oil
    • 1 large shallot, minced
    • 3/4 cup of white rice (I used brown rice in mine to be healthier, but it tastes better with white)
    • 4 tbs. chopped pistachios
    • 8 oz. chicken broth
    • 1/4 cup lemon juice
    • 1/4 tsp salt
    • 11/4 tbs lemon zest
    Directions:
    1. Heat the oil in a heavy saucepan over medium heat.
    2. Add the shallots and sauté 3 minutes.
    3. Add the rice and 2 tbs of pistachios; stir 2 minutes.
    4. Stir in the chicken broth, lemon juice, and salt; bring to a boil.
    5. Reduce the heat to low; cover and cook until liquid is absorbed and the rice is tender (about 20 minutes).
    6. Mix in the remainder of the pistachios and the lemon zest.
    Dessert...
    This pie is a refreshing finish to dinner.  The best part is that it tastes delicious, but is SO easy to make!
    Raspberry-Lemon Pie
    *Recipe from Kraftfoods.com 
    (Serves 8)
    Ingredients:
    • 1 pkg (8oz) cream cheese, softened
    • 1 pkg (4-serving size) lemon flavor instant pudding
    • 1 cup cold milk
    • 2 tsp. lemon zest
    • 2 cups cool whip, divided
    • 1/4 cup raspberry preserves
    • 1 (6 oz) graham cracker pie crust
    • 1 cup raspberries
    Directions:
    1. Beat cream cheese, dry pudding mix, milk, and lemon zest in a large bowl with a whisk until blended.
    2. Gently stir in 1 cup of the cool whip.
    3. Spoon the preserves onto the bottom of the pie crust.  
    4. Cover with the pudding mixture.
    5. Top with remaining Cool Whip and the raspberries.
    6. Refrigerate 4 hours or until firm.
    Enjoy!
    Sit back, relax, and enjoy all of this dinner's deliciousness.  It's one of my favorites and I hope it soon will be one of yours too!