Search this blog

Showing posts with label mexican. Show all posts

Wednesday, May 15, 2013

Quince De Mayo

So...this was supposed to be a Cinco De Mayo post, but I just never got around to putting it up.  Therefore, you get to enjoy a Quince De Mayo post :) (for those of you who don't know - that's 15th of May).  Even though it's no longer Cinco De Mayo, it's never a bad day to have Mexican food and this meal was great!
Drink...
Mexican Bulldog Margarita
*recipe from: Cooking Stoned
These drinks seem to be quite the fad lately as I have seen them all over the place.  I have never actually tried one from a bar, so I can't compare the taste.  However, I thought it was quite delicious!  It was a bit sweet, so if you don't like your margaritas sweet, I would just add less simple syrup.
Ingredients:
(serves 6)
  • 5 Cups Ice
  • 1 Cup Tequila
  • ½ Cup Grand Marnier (I didn't have this so I used Triple Sec)
  • 5 Limes, more for garnish
  • 1 Orange
  • 1 Cup simple syrup
  • 6 Beers, Corona (or I used Trader Jose's)
  • ⅓ Cup coarse Salt
Directions:
  1. Juice the limes and the orange in a large measuring cup, then add in the tequila, grand marnier (or Triple Sec), and simple syrup. Mix together.
  2. Pour the salt into a shallow bowl. Using one of the juiced limes, swipe the outer rim of one of your glasses. Swivel the glass upside down in the salt until the rim is covered. Repeat for each glass.
  3. Add a heaping cup of ice to the blender and just enough of the margarita mixture that the ice is not covered. Blend, adding more ice or margarita mix until the desired thickness is achieved.
  4. Pour the frozen margarita into a salt-rimmed glass, pop open a Corona, and place it upside down in the glass, submerging it into the margarita. Repeat for each glass.  **Make sure your margarita is very slushy.  Mine wasn't thick enough the first time I made it and when I put the beer in it, it all came out of the bottle and overflowed in the glass. **
Dinner...
Spicy Mexican Shredded Pork Tostadas
*recipe from:  The Complete America's Test Kitchen TV Show Cookbook
These might not have been as spicy as I would have liked, but they were amazingly delicious!! Plus, they're super easy because basically all you do is put the ingredients in and let them stew.  Make it - you won't be sorry!
Ingredients:
(serves 4-6)

for the shredded pork:
  • 2 lbs boneless pork butt roast, trimmed and cut into 1 inch pieces (I couldn't find this cut, so I used a boneless pork tenderloin and it turned out great)
  • 2 medium onions, 1 quartered and 1 chopped fine
  • 5 medium garlic cloves, 3 peeled and smashed and 2 minced
  • 4 sprigs fresh thyme
  • salt
  • 2 tbs olive oil
  • 1/2 tsp dried oregano
  • 1 (14.5 oz) can tomato sauce
  • 1 tbs ground chipotle powder or 2 chipotles in adobo suace
  • 2 bay leaves
for the tostadas:
  • 3/4 cup vegetable oil
  • 12 corn tortillas
  • salt
 for the garnishes
  • queso fresco or feta cheese
  • fresh cilantro
  • sour cream
  • diced avacado
  • lime wedges
Directions:
for the shredded pork:
  1. Bring the pork, quartered onion,  smashed garlic cloves, thyme, 1 tsp salt, and 6 cups water to a simmer in a large saucepan over medium-high heat, skimming off any foam that rises to the surface.
  2. Reduce the heat to medium-low, partially cover, and cook until the pork is tender, 1 1/4 to 1 1/2 hours.  
  3. Drain the pork, reserving 1 cup cooking liquid.  Discar the onion, garlic, and thyme.
  4. Return the pork to the saucepan and, using a potato masher, mash until shredded into rough 1/2 inch pieces.  Set aside.
  5. Heat the olive oil in a large non stick skillet.  Add the shredded pork, chopped onion, oregano and cook stirring often, until the pork is well browned and crisp, 7-10 minutes.
  6. Add the minced garlic and cook until fragrant, about 30 seconds.
  7. Stir in the tomato sauce, chipotle powder (or chopped canned chipotles), reserved pork cooking liquid, and bay leaves.  Simmer until almost all the liquid has evaporated, 5-7 minutes.  Remove the bay leaves and season with salt to taste.
for the tostadas:
  1. Heat the vegetable oik in a skillet.
  2. Using a fork, pierce the center of each tortilla 3 or 4 times to prevent puffing and allow for even cooking.
  3. Fry one at a time, holding the metal potato masher in the upright position on top of the tortilla in order to keep it submerged, until crisp and lightly browned, 45-60 seconds (no flipping necessary). 
  4. Drain on a paper towel lined plate and season with salt.
To serve:
  1. Spoon a small amount of shredded pork onto each tostada and top with the garnishes.
Desert...
Pinata Cookies
*recipe from: She Knows Food and Recipes
These cookies have a lot of steps in the directions, but they aren't really too hard.  Don't get intimidated by the number of steps, because they have a great wow factor and are so fun!  I couldn't find a donkey cookie cutter, so mine are star pinatas!  The website I got the recipe from has a great step-by-step tutorial with pictures, so be sure to check it out.
Ingredients:
  • bright colored food coloring
  • sugar cookie dough
  • mini m&m's or other mini candies
  • frosting (I used a mixture of powdered sugar with a tiny bit of milk)
Directions:
  1. Separate the sugar cookie dough into 4-6 equal parts.  
  2. Color each part of the sugar cookie dough a different color.
  3. Line a small plastic container with plastic wrap.
  4. Split up the colored dough and begin layering it in the container, alternating colors.
  5. Cover and freeze the dough for 4 hours or more.
  6. Remove the dough from the freezer and unwrap.
  7. Slice the dough into pieces about a 1/4 inch wide
  8. Place the slices on a baking sheet and bake according to directions on the cookie dough package.
  9. Immediately after taking the cookies out of the oven, use the cookie cutter to cut out the shape of the pinata (work quickly because the dough needs to still be warm so it doesn't crack).
  10. When cutting out the middle cookies, hollow out the center by using a small cookie cutter.  This is where the m&m's will go.
  11. Let the cookies cool.
  12. Lay one solid cookie down and line it with frosting.
  13. Place a hollow cookie on top of it.
  14. Fill the hollow cookie with mini m&m's.
  15. Line the hollow cookie with frosting.
  16. Top with another solid cookie so you have three cookies stuck together and the m&m's in the center.
  17. Eat and enjoy as the pinata breaks open!


Tuesday, April 16, 2013

Reliving my vacation...

It seems like forever ago, but my sister and I went on our "Sisters' Cruise" and had an amazing time.  I am officially addicted to cruising!  Since I can't go on another one yet, the next best thing was to try and re-create some of my favorites from our trip.  Enjoy!

Drink...
The Perfect Storm
My favorite bar on the ship was called Alchemy Bar.  I loved it because it had a cute theme (it was like an old apothecary) and had such delicious drinks!  These drinks were not just poured from a mix like the other bars on the ship, but were carefully crafted with a fiery show and all!  This drink was what I got one night when I asked the bartender to surprise me and it's now one of my favorite drinks.  I tried my best to remember what was in it and re-create it.  I didn't get it exactly right, but pretty close!  I hope you enjoy it as much as I did!
Me enjoying my drink!
Ingredients:
  • 1 shot light rum
  • 1/2 shot of dark rum (I only had light rum, so I just used that)
  • 1 shot strawberry simple syrup
  • 1/2 shot lime juice
  • sprig of rosemary
  • cinnamon
Directions:
for the strawberry syrup:
  1. Make a simple syrup by heating and dissolving 1/2 cup sugar in 1/2 cup water.
  2. Slice  1 cup fresh strawberries and add to the syrup.  
  3. Simmer the strawberries in the syrup for 15-20 minutes, stirring occasionally and smashing the strawberries to get the flavor out. 
  4. Strain the strawberries from the syrup and let cool.
for the drink:
  1. Fill a shaker with ice and add the rum, strawberry syrup, and lime juice.
  2. Shake and strain into a martini glass.
  3. Light a sprig of rosemary on fire until toasted.  Place the toasted rosemary into the drink.
  4. Sprinkle some cinnamon on top (if you want to be extra fancy like on the cruise, you can sprinkle the cinnamon over a flame so it sparks before falling into the glass).
Dinner...
Mushroom Cappuccino
I know...you're thinking: mushroom cappuccino?!?  Gross!  But, wait...this is not gross.  Actually, it's quite amazing.  We went to a cooking demo on the ship where one of the chefs made this.  It really has nothing to do with cappuccino, except that he served it in cute little cappuccino glasses that we could sip the mushroom soup out of.  I didn't have any cappuccino glasses, so I just served mine in a bowl.  Also, on the ship they served it with a garlic crouton which was amazing.  I forgot to make that for mine...oops!
Ingredients:
(serves 4)
  • 1 lb. chopped assorted mushrooms
  • 5 tbs onion
  • 1 clove garlic, chopped
  • 2 oz butter
  • 2 pints chicken or vegetable stock
  • 1 pint cream
  • few drops truffle oil (I didn't have this so I used truffle salt)
  • 1 tsp chopped parsley
  • salt to taste
  • pepper to taste
  • 2 sprigs thyme
Directions:
  1. Saute the onions and garlic in butter.  Add the assorted mushrooms.
  2. Add stock and simmer.  Season with salt and pepper.
  3. When mushrooms are cooked, blend in a blender and sieve through a Chinois.
  4. Return the puree to the pan and add cream and a few drops of truffle oil.
  5. Adjust the seasoning and consistency.  Serve hot with garlic croutons.
Enchiladas Verde
At our first port, Cozumel Mexico, Kate and I had a delicious Mexican lunch included in our beach package.  I had enchiladas verde, which were amazing.  I must admit, mine weren't quite as good as in Mexico, but they still were great and definitely worth making!
Ingredients:
(serves 4)
  • 2 large chicken breasts
  • 1/2 onion, chopped
  • 1 clove garlic, chopped
  • olive oil
  • verde sauce
  • manchego or pepper jack cheese
  • 2-3 tbs sour cream
  • tortilla shells
Directions:
  1. Cook the chicken breasts and shred the meat.
  2. In a pan saute the onion and garlic with olive oil.
  3. Add the cooked chicken, 1/4 cup of verde sauce, and the sour cream.
  4. Place the chicken mixture in the tortilla shells and place in a baking dish. 
  5. Sprinkle with shredded or crumbled cheese.
  6. Bake at 350 degrees for about 20 minutes or until cheese is melted.
Dessert...
Strawberry and Chocolate Frozen Yogurt 
*recipe from: Chocolate and Zucchini
One of our favorite things to do on the cruise was eat (which is probably part of the reason why I love cruises).  And one of the things we ate most was ice cream cones.  They had self-serve, soft-serve ice cream machines located throughout the ship and the ice cream was always there for us!  Our favorite flavor was the strawberry-chocolate swirl frozen yogurt.  My chocolate yogurt turned out pretty amazing with a great texture and good taste.  However, my strawberry frozen yogurt turned out a bit icy, but tasting great.  All I was missing was a cone!
Ingredients:
for the strawberry frozen yogurt:
  • 2 cups strawberries
  • 1 cup yogurt (full fat greek or plain)
  • 1/4 cup heavy cream
  •  1/4 cup sugar
 for the chocolate yogurt:
  • 3 1/2 ounces good-quality bittersweet chocolate, finely chopped 
  • 1/3 cup plus 1 tablespoon heavy cream
  • 1/2 cup plus 2 tablespoons sugar
  • 2 tablespoons good-quality unsweetened cocoa powder
  • a good pinch of sea salt
  • 1/4 teaspoon natural vanilla extract 
  • 10 1/2 ounces full fat plain Greek yogurt  or plain yogurt
Directions:
for the strawberry:
  1. Blend the strawberries in a food processor until pureed.
  2. Add all the ingredients into a bowl and stir.
  3. Place in the freezer and stir every half our until it reaches the desired consistency (about 3 hours).
 for the chocolate:
  1. Melt the chocolate in a double boiler, or in a heatproof bowl set over a saucepan of simmering water, stirring frequently to ensure even melting.  
  2. In the meantime, place the cream in a medium mixing-bowl.  In a separate bowl, whisk together the sugar, cocoa powder, and salt until no lump remains.
  3. When the chocolate is melted, whisk it into the cream. Whisk the sugar mixture into the chocolate cream. Add the vanilla and yogurt, and whisk until well blended. 
  4. Place in the freezer and stir every half hour until it reaches the desired consistency (about 3 hours).
    Me eating frozen yogurt (and popcorn)

Tuesday, February 26, 2013

A Little Taste of Mexico

My sister and I are going on our 2nd annual "Sister's Cruise" soon and I am so excited, I just don't know what to do with myself.  So, to help pass the time, I decided to make some foods in the culinary style of each of the ports we are stopping at on the cruise.  Our first two stops are both in Mexico - Cozumel and Costa Maya.  I don't know how authentic my Mexican meal is, but is sure was delicious!
Drink...
Classic Margarita
There's no way I could do a Mexican blog post without a margarita.  And you won't find any margarita mixes in this recipe - it's the real thing!  At first I thought it tasted quite strong, but after a sip or two, I ended up loving it!  Plus, who knew margaritas were so easy to make??
Ingredients:
  • 2 oz of tequila
  • 1 oz triple sec
  • 1 oz lime juice
  • salt for rimming
 Directions:
  1. Moisten the rim of the glass with water and holding it upside down, dip the rim into the salt.
  2. Fill a glass with ice (I didn't have margarita glasses, so I made mine on the rocks.  If you'd prefer it in a margarita glass, combine all the ingredients in a shaker and strain into the rimmed glass.)
  3. Pour all the ingredients into the glass and stir.
  4. Garnish with a lime. 
Dinner...
Guacamole and Quesadillas
This dinner sounds so simple, but it was sooooo good!  I really impressed myself with this one.  I don't know if it's because I haven't had good Mexican food in a while or what, but this was restaurant-quality!  I will definitely be making it again soon.
Chips and Guacamole
*recipe from: Baby Center Blog
I have a real love of avocados and therefore, I really enjoy guacamole.  This recipe was great as an appetizer/snack and as a topping on the quesadillas.  However...if you like your gauc spicy like I do, your going to need to add a lot more heat to this recipe.
Ingredients:
  • 4 Ripe Avocados
  • 2 Limes, juiced
  • 1 Roma Tomato, diced
  • 1 Small Red Onion, diced
  • 1 Jalapeno, deseeded and diced
  • 1/2 cup Cilantro, chopped
  • 1 tsp Ground Cumin
  • 1 tsp Fresh Ground Black Pepper
  • Kosher Salt to Taste 
Directions:
  1. Cut the avocado across the center and split in halves. Take the pit out and take the avocado out of shell using a large spoon.  
  2. Place in a mixing bowl and add the lime juice. 
  3. Incorporate together using a large spoon to break up the avocado.
  4. Add remaining ingredients, stir to combine, and season to taste.
Chorizo and Pepper Quesadillas
These were amazing!  I usually don't like to toot my own horn too much, but really, these were terrific.  There's nothing too special about them, but the combination of ingredients, perfect cooking of the quesadilla (which is rare, because I almost always burn them!), and delicious toppings made it over the top delicious.  Our toppings were the guacamole, sour cream, and Doug's homemade pico de gallo.  I can't wait to make them again...Soon!
Ingredients:
  • 2 flour tortilla shells
  • 1 chile pepper (I wanted to use a poblano, but our grocery store doesn't have them.  I think the one I used was an Cubanelle, but I'm not sure because there was no label on it at the store), roasted and peeled
  • chorizo sausage (I used Trader Joe's Soy Chorizo because its so delicious and a little healthier), browned
  • shredded cheese - Mexican blend
  • toppings of your choice - ours were: guacamole, sour cream, and pico de gallo
Directions:
  1. Spread all the ingredients over one of the tortillas.
  2. Top with another tortilla.
  3. Place in a skillet and cook until browned on each side and the cheese is melted.
Dessert...
Easy Mexican Flan
*recipe from: The Coach's Wife's Kitchen
I just recently began liking flan (because I had never tried it until recently).  I thought it would be difficult to make, but it's really simple.  While making it, I was thinking..."there is no way this is going to turn out right."  But, it did!  Just keep going when you're making/cooking it - even if it doesn't seem like it's going to work out.  This flan would be an easy way to impress people and is the perfect end to a perfect Mexican dinner!
Ingredients:
  • 1 Cup and ½ Cup Sugar
  • 6 Eggs
  • 1 Can (14 oz.) Sweetened condensed milk
  • 1 Cup Heavy cream
  • ½ Cup Milk
  • 1 tsp Vanilla 
Directions:
caramel coated ramekins
  1. Put 1 cup sugar into a small sauce pan over medium heat stirring constantly. It will slowly melt down to a caramel color liquid. Be careful not to let it burn.
  2. Once all of the sugar is liquid equally pour into ramekins (6 to 8 depending on their size). Swirl the liquid around until it has covered the sides. You will have to hurry it cools very quickly.  (I did not get it coated well and it worked out just fine)
  3. Blend the eggs together, add the milks then slowly add the ½ cup sugar and vanilla. Stir until combined. 
  4. Pour the milk mixture into the prepared ramekins. Place them into a large baking dish filled with 1 to 2 Inches of water. Bake at 325°F for 45 minutes or until a toothpick or a knife comes out clean. 
  5. Cool the ramekins in the refrigerator for at least one hour before serving.
  6. Slide a knife around the edge then tip the ramekin over onto a plate the caramel sauce will spill over the custard. Serve with fresh berries or just alone. YUM!

Wednesday, June 13, 2012

A Very Vegan Birthday

June is a big month for birthdays in my family.  First up was my sister's birthday.  So I thought . . . what a better gift than a blog post dedicated to her!  :)  Since my sister is vegan, I had to change things up a bit from what I am used to doing, and use a few ingredients that are strange to me.  I will say, Doug and I both ate this meal (even though he was a little nervous about it) and decided that if someone hadn't told us it was vegan, we would have no idea.  Some of the ingredients did not taste the same as the real thing out of the package, but when they were all mixed together, they turned out delicious.  
Kate, happy birthday!  Sorry you couldn't actually taste the meal (she lives in San Fransisco and I am in NYC), but know that this one was all for you!
Drink . . .
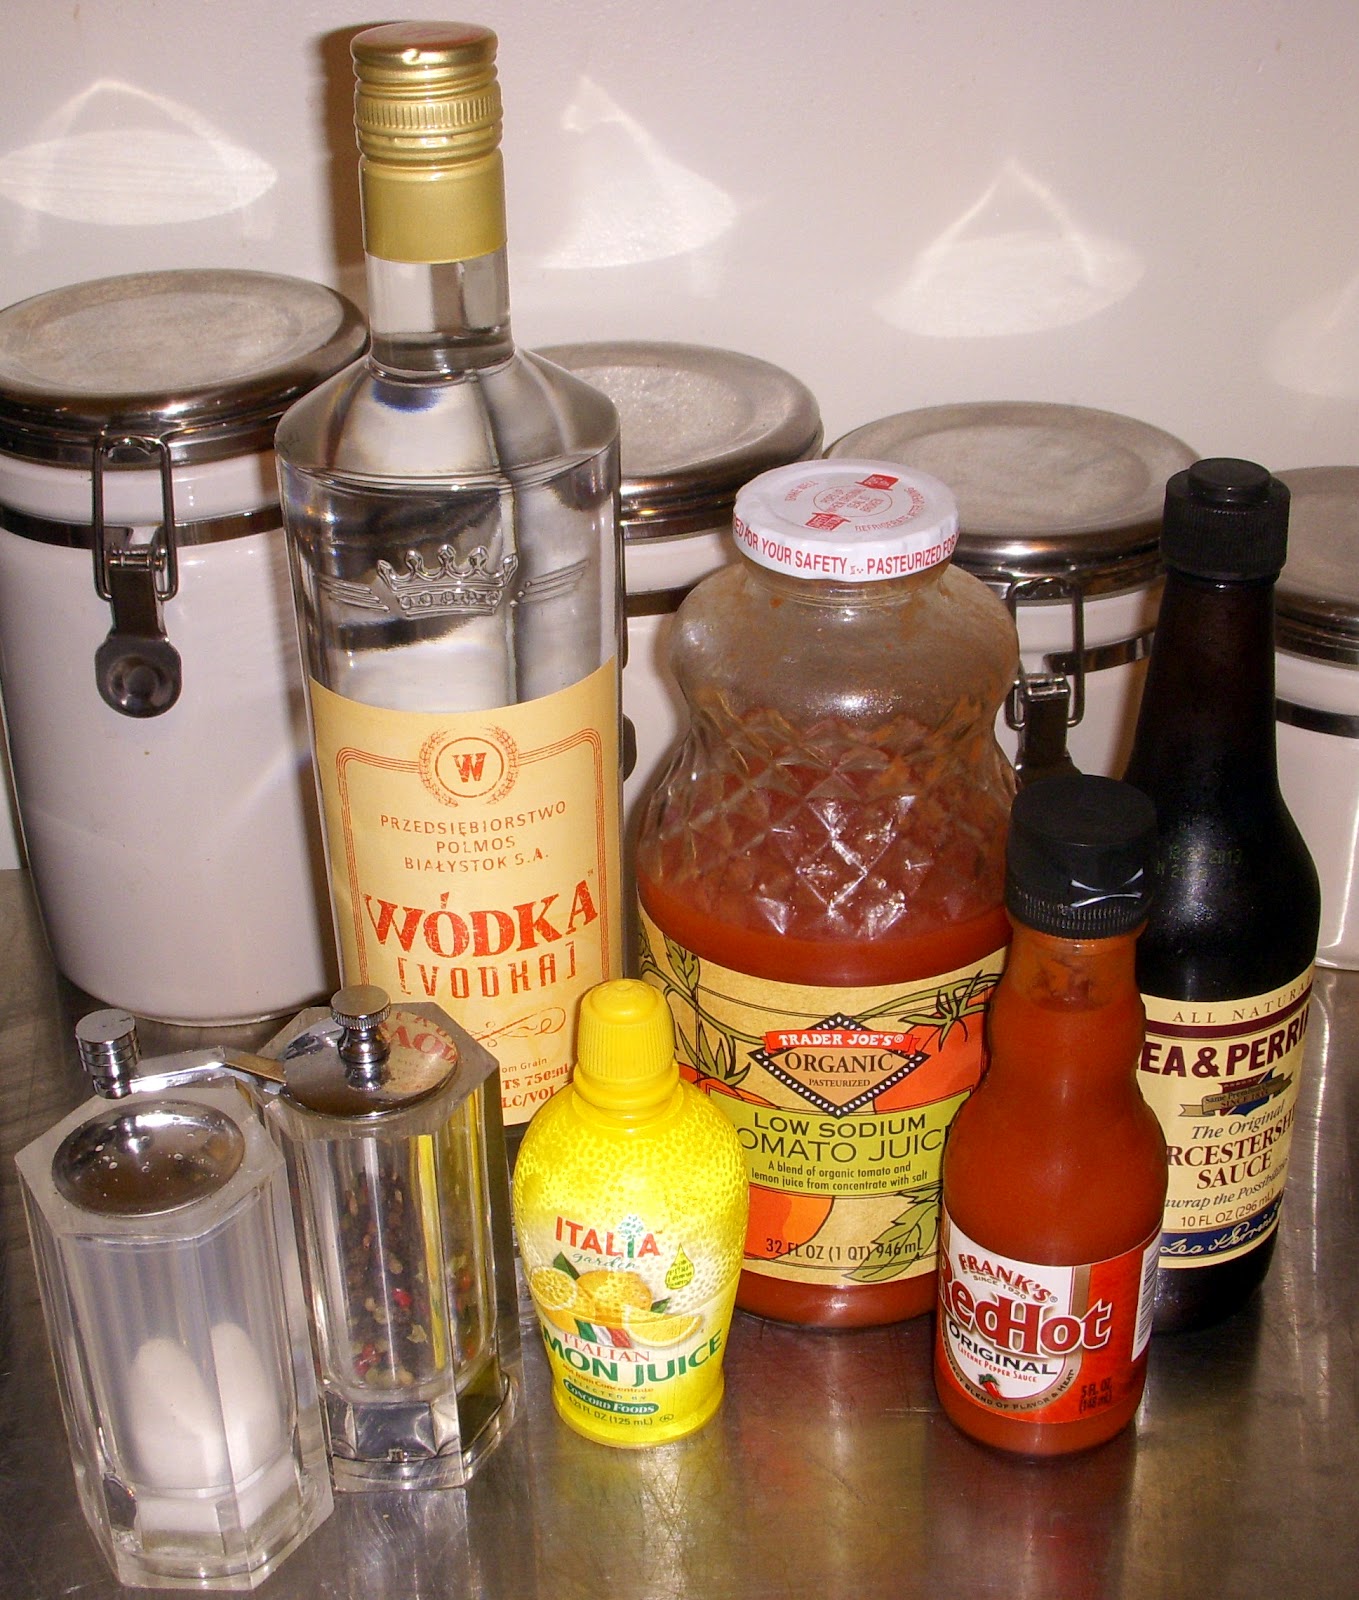
Bloody Mary
I asked Kate what her favorite drink was, and she said it was a Bloody Mary, so here we are.  I never had a Bloody Mary until a few weeks ago.  I was pretty repulsed by the thought of drinking one since I am not the biggest fan of tomato juice and the combination of ingredients sounded disgusting to me.  However, my cousin was visiting and ordered one at a bar.  I gave it a little sip and discovered that I actually do like them!  The one I made here is a pretty pathetic example of a Bloody Mary.  It doesn't have any delicious garnishes or anything.  Being a Bloody Mary novice, I wasn't quite sure what to add, so it's very basic, but still it was quite delicious!
Ingredients:
  • tomato juice
  • vodka
  • lemon juice
  • Worcestershire sauce
  • hot sauce
  • salt 
  • pepper
Directions:
  1. Fill a glass with ice.
  2. Pour in 3 parts vodka to 6 parts tomato juice and 1 part lemon juice. 
  3. Add a dash of hot sauce (or more if you like it spicy!), Worcestershire, and salt and pepper.
  4. Stir and add a couple garnishes to make it more fun than mine!
Dinner . . .
Vegan Seven Layer Tortilla Pie
*recipe from The Vegan Coach
I found a lot of delicious looking vegan recipes in my search, but this was the one I thought I would be most likely to get Doug to eat.  I was going to cheat and just use real cheese instead of vegan cheese (because honestly the vegan cheese scares me), but I went all out and used the fake cheese.  Eating it straight out of the bag was pretty gross, but in the meal it worked out way better than I thought it would.  It actually did get melty and stretchy like real cheese.  We also happened to have some Soy Chorizo already, so I cooked up some of that and added it in as well (and I took out the Cannellini Beans because I'm not the biggest bean fan).  This was great the way I made it, and also would be great with non-vegan ingredients, even though I truly don't think anyone would know it was vegan.
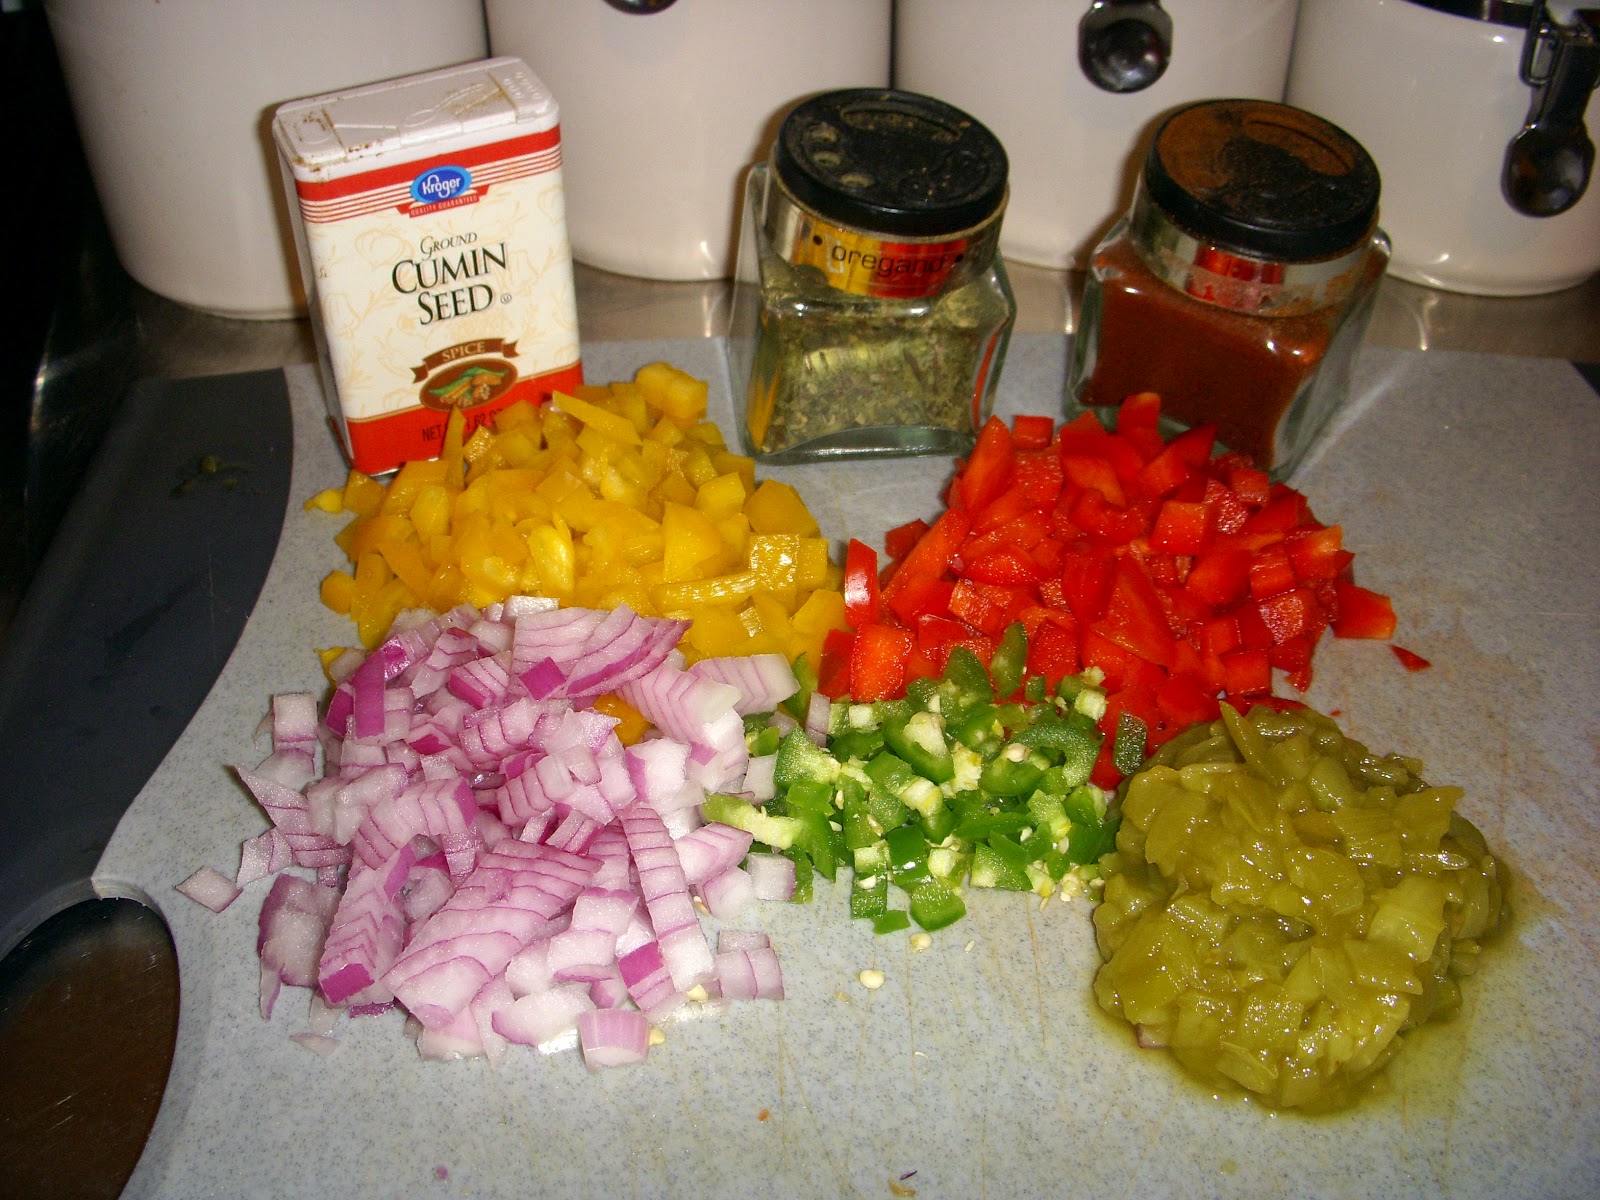
Ingredients:
  • 1 tablespoon extra-virgin olive oil
  • 1 cup sweet red pepper, chopped
  • 3/4 cup green pepper, chopped
  • 1/2 cup red onion, chopped
  • 1/2 (4.5 oz) can chopped green chilis
  • 1 jalapeno pepper
  • 1 teaspoon dried oregano
  • 1 teaspoon chili powder
  • 1/2 teaspoon ground cumin
  • 2 cups tomato juice
  • 3 cups cooked black beans, or 2 (15 oz.) cans black beans, rinsed well and drained
  • 3 cups cooked cannellini beans, or 2 (15 oz.) cans cannellini beans, rinsed well and drained
  • 1 cup non-dairy cheddar cheese, grated (I like Follow Your Heart)
  • 1 cup non-dairy mozzarella cheese, grated (I like Follow Your Heart)
  • 6 (8-inch) flour tortillas
Directions:
  1. Preheat oven to 325F.
  2. Heat oil in a large nonstick skillet over medium heat. Add next 8 ingredients. Saute 5 minutes, or until tender. Add tomato juice. Cook 8 minutes or until reduced to 2 1/2 cups.
  3. Combine black beans and half of tomato juice mixture in a bowl; stir well & set aside. Stir cannellini beans into remaining tomato juice mix; set aside.
  4. Combine cheeses in a bowl; toss well. Line a 9" pie plate with foil, allowing 6 inches of foil to extend over opposite edges of pie plate. Repeat procedure, extending foil over remaining edges of pie plate. (At this point I lay down some parchment paper to avoid aluminum leaching).
  5. Place 1 tortilla in bottom of dish over parchment paper and foil. Spread 1 cup cannellini bean mixture over tortilla. Sprinkle with 1/4 cup cheeses. Place 1 tortilla over cheeses, pressing gently. Spread 1 cup black bean mix over tortilla. Sprinkle with 1/4 cups cheeses. Place 1 tortilla over cheeses, pressing gently. Repeat layers, ending with remaining cannellini bean mixture and cheeses.
  6. Cover with a piece of parchment paper, then bring edges of foil to center; fold to seal. Bake for 40-50 minutes. Remove from oven and let stand, covered, for 10 minutes. Remove foil packet from dish; unwrap pie, and slide onto a serving platter using a spatula. Cut into wedges.
Dessert . . .
Vegan Cherry Torte
*recipe from The Vegan Coach
I love cheesecake, especially cherry cheesecake.  This is not exactly the same thing, but it kind of reminded me of those no-bake cheesecakes.  Anyhow, it was really good, and again . . . it did not taste vegan!  It's super easy to make and great for the summer because it doesn't require baking and heating up the house with the oven (since I cheated and used the ready made graham cracker pie crust instead of making my own :)
I will say, after this meal I am a little more broke though—vegan ingredients are expensive!
Ingredients:
  • 1 package Dream Whip, or 2 packages Soyatoo Soy Whip, made according to package directions (I couldn't find these, so I just bought a can of soy whipped cream from Whole Foods and it worked just as well)
  • 1 (8 oz.) package dairy-free cream cheese
  • 1 cup organic powdered sugar
  • 1 teaspoon vanilla extract
  • 1 can prepared cherry
Directions:
  1. Mix cream cheese, powdered sugar and vanilla.
  2. Prepare whipped topping according to package directions (or just spray it out of the can like me). Fold into cream cheese mixture.
  3. Spread cream cheese/whipped cream combo over crust. Cover with cherries. Refrigerate overnight, or at least several hours. Cut into pieces and serve.


Monday, March 19, 2012

A Hangover Fiesta!

Maybe you had a few too many green beers, Guinnesses, or Irish Car Bombs on St. Patrick's Day and are in need of a meal to help you feel better.  (This post is a little late for that, but we both know that there will be more days when you have a bit of a hangover, so keep this post in mind for future reference.) 
I know when I am hungover, I like to eat greasy, unhealthy, fast-food.  Taco Bell is hard to come by in NYC, but it makes great hangover food.  Since there isn't one nearby, I decided to make my own Taco Bell meal (with a special hydrating drink). This meal turned out so good, I would even recommend it for days when you are not hungover!
Drink...
Coconut Heaven
*recipe from Food.com 
I have heard a lot of hype about coconut water and its magical hangover healing powers.  I have never tried it, but because of it's high potassium and mineral content, coconut water is supposed to be as good or better than sports drinks like Gatorade.  If you like coconut water, I think you would really like this drink.  I, however, realized that I do not like coconut water.  Oh well . . . for those that do like a hydrating coconut water after an evening of drinking, enjoy!
Ingredients:
(makes 1 drink)
  • 16 ounces fresh coconut water
  • ¼ cup half and half
  • 2 tablespoons vanilla
  • 1 teaspoon brown sugar
Directions:
  1. Put all ingredients in a glass.
  2. Stir.
  3. Drink :) 
Dinner...
Crunchwrap Supreme
*recipe from Full Bellies Make Kids Happy
 When I go to Taco Bell, I always get a Crunchwrap Supreme—It's my absolute favorite.  So, when I found this recipe, I was super excited to be able to make them at home!  Taco Bell must have gigantic tortillas, because mine turned out about half the size of theirs.  They tasted just as good though (of course you can't really replicate that taco bell beef, but these were close :)
Ingredients: 
(makes 4 small Crunchwraps)
  • 4 Large Flour Tortillas (burrito style)
  • 1/2 lb ground beef
  • 1/2 packet taco seasoning
  • sour cream
  • nacho cheese
  • tortilla chips (you could use use a corn tortilla)
  • tomatoes
  • lettuce 
Directions:
(I changed the order of the directions on the website to match the ones given by a reader who left a comment saying she worked at Taco Bell and gave the proper Crunchwrap building order.)
  1. Brown ground beef in a skillet, add the packet of taco seasoning and stir until mixed well. Cook for another minute or so.
  2. Microwave the tortillas for a few seconds just to warm them up, it will make the wrapping easier.
  3. Take a tortilla, spread some nacho cheese in the center.
  4. Top with ground beef (1/2 lb ground beef made 4 crunchwraps, but they were small tortillas. If you had bigger ones, it would probably make 2).
  5. Next, add a layer of tortilla chips or at this point you would add a small corn tortilla like a tostada size.
  6. Top with sour cream.
  7. Add lettuce and tomato and then starting on the bottom, fold up the tortilla toward the center, continue all the way around until it is all folded over, it WON’T cover it completely.
  8. Carefully lift it up and set it fold side down on a non stick pan. Press with a spatula and cook until nice and brown, flip it over and cook the other side. It won’t take long at all.
Dessert...
Churros with Nutella Dip
*churro recipe from Sticky, Chewy, Messy, Gooey cookbook by: Jill O'Connor 
What dessert goes with a Crunchwrap?  Churros of course!  These were ridiculously easy to make and tasted like real churros.  The only problem I encountered was that my churros were curling up in the oil instead of being straight sticks.  But, they still tasted the same despite the crazy shapes!  
The recipe I had for these had a hot chocolate dipping sauce recipe along with it.  However, this winter Doug and I went to Bryant Park and had a delicious churro with melted Nutella drizzled over it.  It was so good and easy, so I decided to do a Nutella dipping sauce and it worked wonderfully! 
Ingredients:
(serves 2)
  • 1/2 cup water
  • 1/8 cup light olive oil
  • 1/4 tsp salt
  • 1/2 + 1/8 cups flour
  • 2 eggs
  • peanut or canola oil for deep frying
  • 1/2 cup sugar
  • 1 1/2 tbs cinnamon
  • Nutella
Directions:
  1. Combine the water, oil, and salt in a saucepan.  Bring to a full, rolling boil.
  2. Remove from heat and add the flour all at once.  Stir briskly with a wooden spoon until the dough pulls away from the sides of the pan and gathers in a clump around the spoon.  
  3. Place the pan with dough over medium heat and stir the batter for 30–60 seconds more.  This will dry any excess moisture and eliminate any raw flour taste from the dough.
  4. Place the dough on a sheet of aluminum foil and let cool for about 5 minutes.
  5. Return the dough to the pan and add the eggs, one at a time, beating briskly after each addition until the egg is fully incorporated and the dough is smooth, slightly sticky, and malleable.  (This was quite a workout because the dough is thick and it takes a while to get the lumps out)
  6. Pour oil 3 inches deep into a skillet or deep-fryer.  Heat the oil to 365 degrees.
  7. Meanwhile, stir the cinnamon and sugar together in a large, shallow dish.
  8. Fit a large pastry bag with a large star tip.  Fill the bag with the dough.
  9. Pipe strips of dough into the oil, and cook approximately 2 minutes per side.  
  10. After cooking, pull the churros out of the oil using tongs and place on a plate lined with paper towels to cool.
  11. After they have cooled slightly, roll the churros in the cinnamon sugar.  
  12. Melt the Nutella in the microwave and enjoy dipping the delicious churros in this tasty hazelnut chocolate dip!